Showing posts with label Yogurt. Show all posts

Tuesday, December 19, 2006

The Unbeatable Root # 1 : Beetroot Tomato Cucumber Raita

IMG_0158

A lifebuoy in a boat? :)

One big misconception that got cleared in mind about two years back is that beetroot contains lots of iron. Just like almost everybody else around me, I too used to think beetroot would be a great weapon against Anaemia. But nope, it isn't. It has lots of goodness in it, but no iron.
Like it has Folate in it. A nutrient that is of utmost importance just before and after conception. And a lot of fiber, which is of great importance throughout one's life.

The recipe that I have got for you today includes two more virtuous vegetables - cucumber and tomato. Healthy? No doubt. My own recipe idea? No d...... No. :) The original recipe is by Tarla Dalal. But it's a great one, I tell you. Have a look.


IMG_0155


Recipe for Beetroot Tomato Cucumber Raita

Serves 4.

Ingredients:

1 cup fresh yogurt, beaten
1 beetroot, boiled and cut into cubes
1 cucumber, chopped
1 large tomato, chopped
2 tbsp roasted, skinned, coarsely crused peanuts
1 green chilli, chopped
2 tbsp grated fresh or dessicated coconut (optional; I use seldom.)
1 tsp sugar
salt to taste

1 tbsp oil
1 tsp cumin seeds
a pinch asafoetida

coriander leaves for garnishing

Method:

1. Mix all ingredients in the first list (upto salt).
2. Heat oil in a Tadka ladle. Take the ladle off the heat and add cumin seeds. Once they splutter, add the asafoetida.
3. Let the Tadka cool a little, then add it to the Raita and mix it well.

Serve with Parathas for brunch or as an accompaniment to any meal.

By the way, this dish has had a 100% success rate at my place so far. None of the times that I have made it when entertaining guests, have I had to put any leftovers back into the fridge. (I make it so complicated!! I could have just said that the bowl is polished off clean. Any idea where you can take Creative Writing classes, Guys?)

Thursday, December 14, 2006

Indian Winter # 1 : Garlic Greens Chutney

IMG_0202

Garlic Greens Chutney decorated with a garlic greens braid

Although garlic is available (in almost the whole world?) all year around, the green chive-like shoots on garlic are to be seen in the markets here in Pune only during winter which is from November to January. When you spot these and some more veggies in the markets, you know it is winter.

Growing garlic greens is rather easy, I have heard. I have also been planning to do it for some time now. But I guess, I don't have a green thumb like Inji Pennu. I don't know whether it's the lack of dedication or interest or just the lack of enough water(?), but my plants often die prematurely. :( Shammi, maybe you relate to me?
Well, anyway, the point is that I cook with garlic greens only when they are available in the market, which they are right now. Lots of them. Among other things, what I also made with them is this chutney. Let me add that this one is entirely my creation. I mean, ok, it's just a simple recipe and no diagram for making rockets, but heck, it's mine!!!

By the way, in case you want to grow garlic greens at home, Martha Stewart has got some help to offer.


IMG_0198

(Left to right) Garlic greens with fresh cloves at one end and roasted, skinned peanuts

Recipe for Garlic Greens Chutney

Makes 1 cup.

Ingredients:

7-8 stalks of garlic greens
½ cup roasted, skinned peanuts
½ cup beaten yogurt
1 large chilli
1 tsp chopped ginger or ginger paste
a pinch sugar
salt to taste

1 tsp oil
½ tsp cumin seeds

coriander leaves for garnishing (or a braid made with three green garlic stalks)

Method:

1. Wash the garlic greens. Remove the roots at the end and discoloured stalks, if any.
2. Mix all ingredients in the first list (i.e. upto salt) in a grinder and grind until you have a smooth paste. Take this paste out into a serving bowl.
3. Heat the oil in a Tadka ladle. Once hot, add the cumin seeds to it and take the ladle off heat. The cumin seeds will pop in the hot oil. Let the oil cool a little.
4. Add the Tadka to the garlic greens-peanut paste. Either mix and serve OR leave the Tadka on top; it makes for an interesting garnish.

Serve this chutney as an accompaniment with any meal. In case you don't mind having garlic for breakfast, you could serve it with Idlis or Dosas too.

Notes:

1. In case you do not have access to garlic greens, you could use regular garlic too. The chutney will still taste good. However, if you can make garlic greens available for yourself, then I'd highly recommend it, because the greens lend a unique depth of flavour to the chutney.

2. If you have much more garlic greens on hand than what this chutney requires, try using them in place of regular garlic in any dish. You won't regret, I guarantee.
I would like to send this first post in my series 'Indian Winter' to Kalyn for her Weekend Herb Blogging. I know, it's gonna be a 'Holiday Special' edition this time around, but then we don't have holidays here in India. :(

Sunday, November 05, 2006

A wish fulfilled : Pineapple Coconut Muffins

IMG_0034

Pineapple Coconut Muffins

Do you know what pineapple is called in German? 'Ananas'! Which means, if you know Marathi or Hindi, then you already know a little bit of German. :) :)

Let me leave humour aside now and thank my kid-cousin, Leena for this post. It is because of her that I made these muffins in Düsseldorf. She had come visiting us along with her parents (her mother is my father's cousin) and her brother in September. A fortnight before we left Germany for good. I know, it sounds weird, but weird can be fun sometimes, right? So there.

Leena had come to us with this big wish of baking something with me. She loves baking, and she knows that I do too. And bake we did. Only a bit in a hurry. A few hours before they were to leave our place. Sounds weird again, I know, but she really really wanted to bake, and we hadn't managed it until then because we were busy doing 'Düsseldorf-Sightseeing'.

By the way, lack of time wasn't the only hurdle there. Once I realised that I had to bake something with her, I started looking for recipes. However, every recipe that looked 'do-able' asked for some ingredient or the other that I didn't have in stock. Naturally, because I had kinda started finishing off stuff because of the impending move. What I did have, though, was all-purpose flour. And that is what saved me. The paper bag containing the flour, to be precise. I found this recipe on that bag and guess what (!), I had all the ingredients. Apart from rum, that is. Well, even if I had it, I wouldn't have used it, because two kids were gonna have those muffins. And did they have them? Oh yes, with lots of gusto. And they got a few packed for the journey too. What I got in return was a tried and tested recipe AND my kid-cousin's happy face. A win-win situation, what? :)

Recipe for Pineapple Coconut Muffins

Makes 15 rather large muffins. You might consider making 18 smaller ones.

Ingredients:

200g. all-purpose flour
2 tsp baking powder
50g. dessicated coconut
250g. pineapple pieces (Preferably canned.)
1 egg
150g. brown sugar (White sugar should be ok too.)
100ml oil (I used sunflower oil.)
250g. plain yogurt
1 tbsp rum (I used milk instead.)

Powdered sugar for dusting (optional; I used)

Method:

1. Preheat the oven to 170°C.
2. Sieve the flour and baking powder together. Add the dessicated coconut to it.
3. Beat the egg. (I used a simple fork for it.) Add the sugar, oil, yogurt and rum/milk to it. Cut the pineapple into smaller pieces, in case the ones from the can are largish. Add them to the mixture and stir well.
4. Add the flour mixture and stir until just mixed. You need not use your electric beater here. Just a large spoon is enough.
5. Grease the muffin moulds with butter/oil or line them with paper cups. Fill the batter in them and bake in the pre-heated oven on the middle rack for 20-25 minutes.
6. They are done when a skewer/ knife inserted in the middle comes out clean. Then take out the muffin pan and let it cool for 5-10 minutes.
7. Unmould the muffins and let them cool on a cooling rack.

Dust with powedered sugar, if you like.

Great for breakfast, as evening snack or when on the road. I've got the feedback. :)

IMG_0037

I'd like to send this plateful of muffins to Nandita for WBB #7 Baking for Breakfast and to Meeta for MM #6 Give Thanks. And I thank them for hosting these events. (Enough of your wordplay, Vaishali. It's time to end the post now.)
-takes cue- Ok then, Bye Folks. ;-)

Tags: , , , ,

Wednesday, August 30, 2006

Dum Bhindi (Okra marinated in Yogurt)

IMG_0017

Do you like this picture? Do you find it different? Yes?
Do you know why? No?
Fine, then let me tell you. -tries to hide the extreme gleam, but fails- It...is...because...I...have...a...NEW CAMERA!!!!!! Yay!!!! It's a birthday present from Hubby Dear. Well, I asked for it, but it still is a present. :) :) I am sooooo excited. It is all that I wanted in a camera. The one I used so far did not really do justice to my extraordinarily artistic(!) ideas, you know. ;-) But hey, I still love my old Kodak buddy. It was there for me throughout my 'teething' days. :)

Anyway, coming back to today's dish, the recipe for which I found here. I came across it while looking for different recipes for Bhindi/Okra/Lady's Fingers, because that is one of the few vegetables, which are always fresh and available at my favourite SriLankan shop. Which means that I cook okra at least once a week, if not twice. However, cooking the same vegetable always in the same way is boring for me. Not enough excitement in the kitchen, you see.

Well, then how is this dish? First of all, it is 'Satvik', meaning (amongst other things,) it has no onion or garlic, which makes it perfect for all the religious feasts that we are gonna have until Diwali. Also, the combination of spices used in it makes it very special. The texture of cooked okra in it is not exactly crispy, as many like it to be. It is slightly chewy, but not rubbery. What would attract the people at home (and maybe the neighbours too!) to the kitchen is the aroma of it while it cooks. Sniff sniff...ummmmmmm..... :)

IMG_0012

Clockwise from left: Fresh okra, green chillis, yogurt, red chillis being pounded

Recipe for Dum Bhindi

Serves 4-5.

Ingredients:

500 g. Bhindi/Okra/Lady's Fingers
1 cup yogurt
1 tsp Garam Masala (I used store-bought Sabji Masala instead.)
+ some more Garam Masala (I did not substitute this.)
2 red chillis, pounded
2 green chilies, chopped
4 tsp ghee (I used 1 tbsp Ghee and a non-stick pan.)
+ some more Ghee ( a few drops)
4 tsp ginger paste ( I used julienned ginger.1)
¼ tsp turmeric powder
salt to taste

Method:

1. Using a mixer, blend together yogurt, Garam Masala (or Sabji Masala), salt, pounded red chilis and one chopped green chilli. Take it out into a largish pot, which will also accomodate the Bhindi.
2. Wash,wipe, top and tail the Bhindi. Cut it in 1 inch long pieces and make slits in it, making sure that it does not get cut in half.
3. Soak it in the yogurt mixture and let it marinate for about half an hour. Like so.

IMG_0014

Clockwise from bottom left: Ginger juliennes, whole ginger,
okra marinating in yogurt-spice blend

4. Heat the Ghee in a pan. Add the ginger paste (or juliennes), the other green chilli, turmeric powder and fry it for about a minute.
5. Now add the Bhindi with the marinade, stir, and cook uncovered for 10 minutes.
6. Sprinkle some Ghee and a little Garam Masala on top of the Bhindi. Cover the pan with a lid. Steam-cook on a low heat for 5 minutes.
7. Remove the lid and cook till almost dry. This may take around 15 minutes.

Serve hot with chapatis or Missi Roti or with rice and Dal.

Note:
1. I julienned the ginger or cut it into matchsticks instead of paste, because the paste while frying causes *oil sprays*, leaving the cooking herd, counter-top and your hands very oily. On the other hand, the matchsticks fry rather *peacefully*. Also, they are a pleasure to bite into. :)

This would be my second entry to this month's JFI hosted by Vineela. There could be a third one, if Vineela is ready to accept it late. I have made and photographed the dish, but cannot publish it until Tuesday next week, because I am off on a short holiday. Ciao ciao! (By the way, that's a clue. ;-) ;-))

Wednesday, August 23, 2006

Bottle Gourd Curry with Moong Dal & Yogurt

100_6802

The curry is not as yellow as it looks in the photograph.
I think, I went overboard while trying to adjust the contrast. :)

I learnt this recipe from my mother. Also, I have only seen her making this preparation and nobody else. (Although I am sure that somebody in some corner of this world must be making it too. :))
Anyway, when she gave me the recipe, she just mentioned in passing that it is based on a Kerala recipe, although she did not mention which one. (As I have mentioned before, she has studied Home Science, in which the students get to learn a lot of cuisines. Hence the connection.)
Before I started blogging, my knowledge of the cuisine of Kerala was limited to 'Avial'. And I knew that this dish could not have been based on that. So I just left it at that.

Then, a few days back, when Indira blogged about 'Kaalan', a bottle gourd and yogurt preparation from Kerala, I was sure it was the mother of this preparation by my mother. :)
As you can see in the next pic, I made this curry with the beautifully round bottle gourd, which was in the guessing game yesterday. Here's how I prepared it.

Recipe for Bottle Gourd Curry with Moong Dal & Yogurt

Serves 4.

Ingredients:

approx. 500 g. bottle gourd/Doodhi/Lauki (3 packed cups, when diced)
1 tbsp Moong Dal, washed and soaked in about ¼ cup water for ½ hour
4-5 tbsp yogurt, beaten smooth
3-4 green chillis
salt to taste

1 tbsp oil
½ tsp mustard seeds
1/8 tsp turmeric powder
a pinch asafoetida powder

chopped coriander leaves for garnishing

100_6797

Clockwise from top: Bottle gourd, green chillis, Moong Dal


Method:

1. Wash and peel the bottle gourd. (You need not throw away the peels. This chutney can be made using them.)
2. Dice the peeled bottle gourd. Cut the green chillis in ½ inch long pieces.
3. Heat the oil in a pan, and add mustard seeds once it is hot. Once they splutter, add the asafoetida powder.
4. Add the Moong Dal along with the water and quickly cover the pan with a lid. The water tends to jump high at this point, and may burn your fingers.
5. After about two minutes, open the lid, and add turmeric powder and bottle gourd dices to the pan. Stir and add ½ cup of water.
6. Cover and cook the bottle gourd on medium-high heat for about ten minutes.
7. Once the bottle gourd is cooked, add salt, yogurt and green chilli pieces.
8. Cook uncovered for 2-3 minutes, while stirring often, so that the yogurt does not separate too much.

Garnish with chopped coriander leaves and serve warm with phulkas/chapatis or rice & dal.

Tags: , , ,

Tuesday, August 15, 2006

Bottle Gourd Peels Chutney

100_6744

Idlis & Bottle Gourd Peels Chutney

One of the themes doing the rounds of food-blogosphere these days is 'Chutneys'. One of the main ingredients of it being peels of vegetables. I have blogged about one such chutney already. Here's another one. But it's not just another chutney, you know. It is not just eco-friendly but also very very tasty. Because it is made with peels of bottle gourd (Doodhi/Lauki).

100_6488

Bottle gourd being peeled

And now that I am back from my trip to the Black Forest (with a postcard for the next BPW event by Meeta ;-)) , I can also share the recipe for this chutney. Here it is.

Recipe for Bottle Gourd Peels Chutney

Ingredients:

Peels of one biggish bottle gourd (I took 1½ cups.)
¼ cup dry-roasted sesame or ¼ cup roasted and peeled peanuts
or ¼ cup roasted Chana Dal (Dariya in Gujarati/Pandharpuri Daale in Marathi)
or a combination of any of these making ¼ cup
(I used 1/8 cup dry-roasted sesame + 1/8 cup roasted & peeled peanuts.)
¼ cup yogurt
2 green chillis (or to taste)
¼ cup chopped coriander leaves
1 tbsp sugar (or to taste, depending upon the heat from the chillis)
salt to taste

1 tbsp oil
½ tsp mustard seeds
½ tsp cumin seeds
heaped ¼ tsp asafoetida powder

100_6729

From left to right: chopped bottle gourd peels, roasted & peeled peanuts, coriander leaves, sesame seeds

Method:

1. Chop the bottle gourd peels and green chillis.
2. Heat the oil in a pan. When hot, add mustard seeds. Once they start popping, add the cumin seeds, and then the asafoetida powder.
3. Add the chopped bottle gourd peels and green chillis. Stir. Sprinkle some water, cover the pan and let them steam-cook. (I usually use a non-stick pan for this, so I do not really need much water. However, if you are using a regular pan, you might need to add about ¼ cup of water, and also keep a close eye.)
4. Once the peels are soft (They fall apart easily when pressed with a ladle.), add sugar, salt and chopped coriander leaves. Sauté until most of the water has evaporated. Turn the heat off, and let it cool.
5. Once it is cool, add it along with the roasted sesame seeds or peanuts or the combination you are using and the yogurt to the jar of your mixie or food processor. Grind it till you get a fairly smooth paste. The chutney is ready!

Serve it with anything of your choice like Idlis, Dosas, spicy parathas or just with any regular meal. This mild-tasting chutney goes well with a lot of things. I served it this time for breakfast, with Idlis...so that I can send it to Nandita for her next 'Weekend Breakfast Blogging' event. :)

100_6743

In case you are in a mood to try out more chutney varieties, you could check out these lovely recipes recently blogged by Madhu of Ruchi, Mythili of Vindu, Priya of Sugar And Spice and Shammi of Food, in the main...

In the meanwhile, here's wishing all of you a Happy Independence Day!

Tags: , , , ,

Wednesday, April 12, 2006

Red Pumpkin Raita (For some, Laal Bhoplyache Bharit)


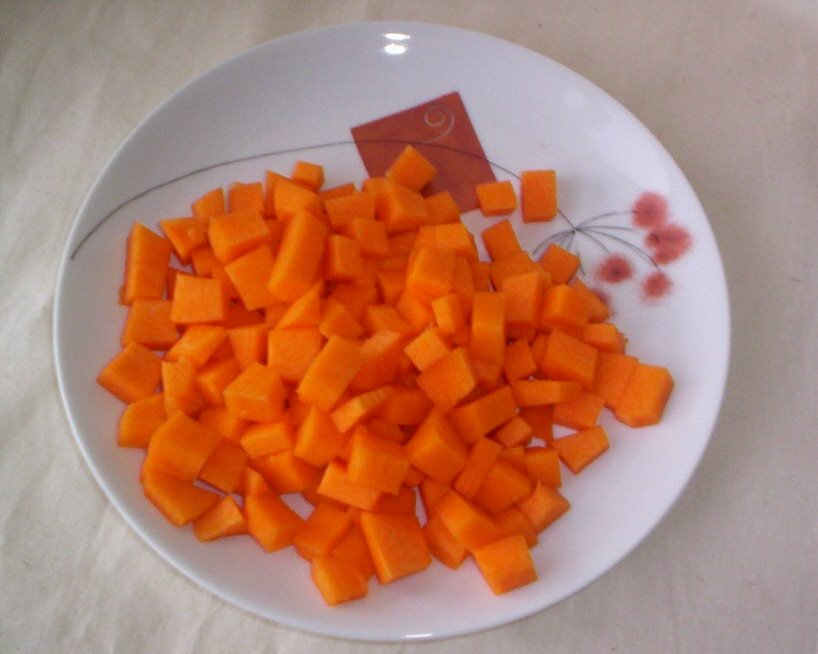
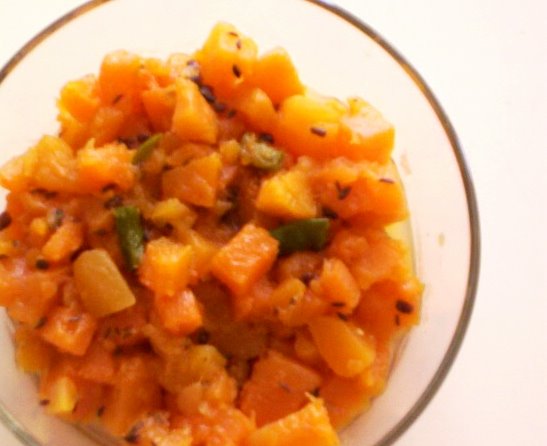
Pumpkin: before & after

Red pumpkin or Laal/Tambda Bhopla (Marathi) or Kaddu (Hindi) is poor man’s source of carotene in India. Other sources (like apples, carrots) normally happen to be rather expensive when not in the peak of season. Red pumpkin, however, is ‘in season’ throughout the year unlike in the Western countries, where it is typically an Autumn appearance. I get my supply of this vegetable after Halloween from a Turkish vegetable vendor nearby. In case it is not available in your area, Butternut Squash can be used as a substitute.

My childhood memories of this vegetable are of a story, which goes ‘Chal re bhoplya tunuk tunuk’. It is about a clever old woman, who on the way to her daughter’s place happens to be passing through a jungle. A fox sees her, and sees her as his lunch. He tells her that he wants to eat her. (What a sophisticated, polite fox!) She tells him that he wouldn’t enjoy it much because she is all bones and skin. However, she gives him the idea, that he could perhaps eat her on her way back. Because then she would be well-fed by her daughter. The convinced fox lets her go. After a few days, when the clever old woman has to come back, she takes a large pumpkin from her daughter and carves it in a way, where she can be inside the pumpkin with her head, arms and legs sticking out. The pumpkin practically looks like a round torso then. When she sees the fox again in the jungle, she just runs and the fox never manages to catch her because she is in that too-large-to-grab pumpkin. While running, she keeps telling the pumpkin to go faster, which is ‘Chal re bhoplya tunuk tunuk’.

Do you have any such stories from your childhood? Please let me know.

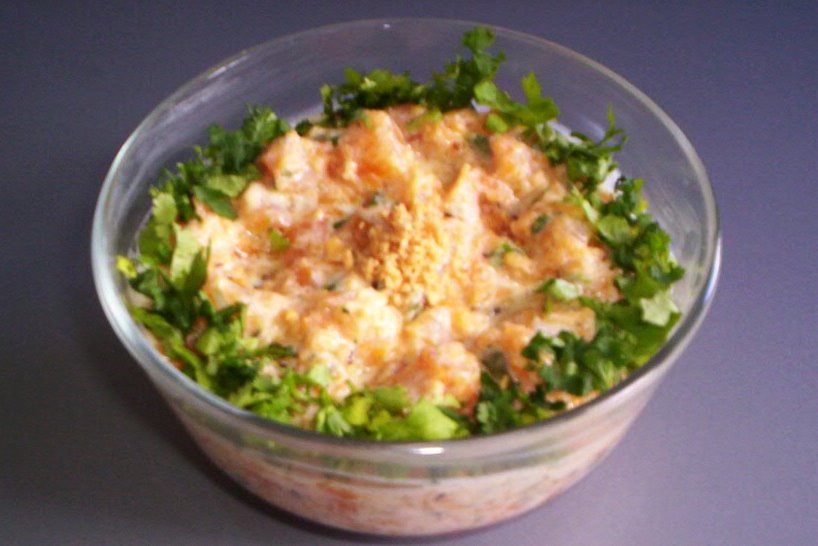
In the meanwhile, the recipe for Red Pumpkin Raita.

Serves 4.


Clockwise from left: cumin seeds, fenugreek seeds, green chillis, coriander leaves, asafoetida

Ingredients:

approx. 500 grams red pumpkin (once cut, the pieces should be about three cups full)
1 tbsp oil
¼ tsp fenugreek seeds (optional)
½ tsp cumin seeds
a generous pinch asafoetida
1-2 chopped green chillis
¼ cup beaten yoghurt
1 tsp sugar
salt to taste

4 tbsp crushed roasted peanuts (readymade roasted peanuts are fine; in case you want make them from scratch, read this post by Indira of Mahanandi )

some chopped coriander leaves for garnishing

Method:

1. Peel and chop the pumpkin coarse. Cook it with some water till soft. Alternatively, pressure-cook the pumpkin without water for 5-7 minutes. Wait till the pressure dies down. Take out the cooked pumpkin pieces and keep aside.
The cooked pumpkin keeps well in the refrigerator for several days, if stored in an air-tight container. It comes in handy, whenever you need to make Raita.
2. Heat the oil in a pan. Add the fenugreek seeds, if using. Add cumin seeds and wait until they pop. Add the asafoetida.
3. Now add the green chillis and the pumpkin pieces.
4. Sauté the mixture on medium heat until the pumpkin pieces start falling apart while stirring.
5. Turn the heat off.
6. Take the sautéed pumpkin out into the bowl, in which you want to serve it. Let it rest partly covered until cooled down.

7. Once it is cool, add the sugar, crushed peanuts, yoghurt and salt to taste.
8. Garnish with coriander leaves.
9. Serve at room temperature or chilled with rice / chapattis and any kind of curry. Goes well with spicy rice preparations like Biryanis, too.


Tags: , ,

Wednesday, April 05, 2006

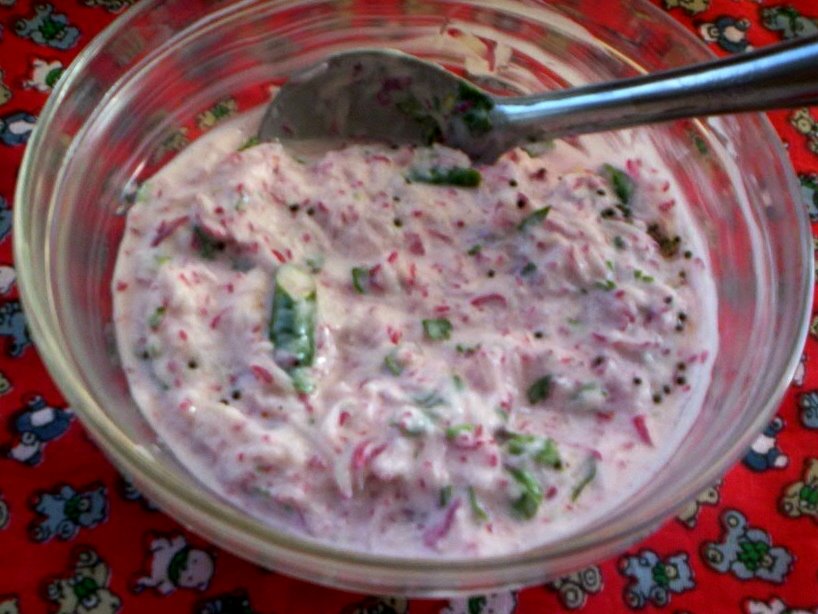
Mulyachi koshimbir (Radish raita)

A bunch of red radishes
This one is a very ‘everyday’ Maharashtrian dish. Something that you would see on the table at my parents’ place every few days, but rarely when there would be guests coming around for lunch/dinner. Radish or Mula (in Marathi) or Mooli (in Hindi) is a vegetable which many people do not like or avoid. I guess it is because of the strong smell it emanates and also because of the bad breath that may stay with you for some hours. I have no problems with the former, and the latter is anyway something that others will have a problem with. Well, tough luck, guys! I will have my radish when I have to.

Now, Koshimbir or Raita is something that Nupur of One Hot Stove has already written about. So, I will proceed straight to the recipe.

Recipe for Mulyachi Koshimbir (Radish Raita)

Ingredients:

A bunch of red radishes (mine had 24 of them)
½ cup yoghurt
salt to taste
some coriander leaves for flavour & colour

1 tsp oil
¼ tsp mustard seeds
2-3 green chillis

Method:

1. Clean, wash and grate the radishes. A food processor with a grater attachment (or an enthusiastic/obedient husband) will come in handy. My radishes yielded 1 1/2 cups gratings. You could take the same amount of white radish instead of the red variety.
2. Squeeze the gratings lightly in your palm and transfer them to the bowl in which you would like to serve the Koshimbir. (I know there will be loss of nutrients when you squeeze out the juice, but if this is not done, the Koshimbir will be totally watery and unenjoyable.)
3. Add the yoghurt to the radish gratings. Add salt and chopped coriander leaves.
4. Cut the chillis in pieces a centimetre long.


5. Heat oil in a pan/tadka ladle.
6. Once the oil is hot, add the mustard seeds. Let them splutter.
7. Add green chillis and take the pan/ladle off heat. This way the chillis won’t discolour.
8. Let the pan cool down. This is VERY necessary as otherwise the hot oil can ruin the taste because it would make the yoghurt bitter.
9. Mix the Koshimbir well. Garnish with some more chopped coriander leaves, if you like.
10. Serve as a side dish with rice and dal or chapatis at room temperature . Or chilled in summer (What’s that? We don’t get it here in Germany).

If chilling/storing in the fridge, make sure that it is tightly covered, otherwise it will transfer its strong smell onto other food stuff.


Tags: ,