Thursday, July 27, 2006

A Ton Of Protein # 8 - Kataachi Aamti

100_6739

Kataachi Aamti (Do you see the reflection of my camera in it? :)

Although I have been cooking a lot everyday since my parents-in-law are here, that is also the reason why I find little time to blog. However, I have been religiously taking photographs of all new/different dishes. Which means that I will blog about all them sooner or later. Today's * lucky * dish is Kataachi Aamti.

In my post on Puranpoli, I mentioned that it is often served with this spicy Dal prepared with water (kat) drained from the cooked Chana Dal. To thicken the Aamti, some of the stuffing (Puran) is used.
To be honest, it is not really a practical idea to make Puranpoli every time you want to make Kataachi Aamti. Moreover, who says that it cannot be served with rice or phulkas? So there.

What I am giving here is the way to make it with Chana Dal cooked only for this purpose. A few things about this Aamti, before I start off.
Kataachi Aamti is supposed to be rather watery. It is actually *drunk* from the bowls in which it is served. :) Also, this preparation is sweet, sour, rather spicy and very very aromatic. When you make it, you will know at once that it is a special festive preparation. But how will you make it, unless I give you the recipe? (That was my attempt at humour, by the way. Does anybody know of laughtrack for blogs? I so wish I could use it here.) Anyway, here's the recipe.

Recipe for Kataachi Aamti

Serves 6.

Ingredients:

½ cup Chana Dal
2 tsp Goda Masala
1 tsp tamarind concentrate dissolved in ¼ cup of water
2 ½ tbsp jaggery or muscovado sugar (I used m. sugar.)
½ tsp chilli powder
¼ tsp turmeric powder
salt to taste
upto four cups of warm water

1 tbsp oil
½ tsp mustard seeds
a pinch Methi/fenugreek seeds (approx. 10 seeds)
heaped ¼ tsp asafoetida powder

To be ground together:
3-4 tbsp grated dried coconut (Kopra)
2 peeled cardamom pods
2 cloves
½ tsp cumin seeds
a pinch grated nutmeg
¼ tsp cinnamon powder (Or a 1" piece of cinnamon)

curry leaves or chopped coriander leaves for more flavour as well as garnishing (optional)
a dash of lime juice to enhance the flavour as well as to stop the spices from * burning the throat * :)

100_6734

Clockwise from top:
cooked Chana Dal, cinnamon, cumin seeds, grated dried coconut, cardamom, cloves, nutmeg

Method:

1. Pressure-cook the Chana Dal with 1 cup of water. Once cooked, mash it well with a ladle or with a hand-held blender.
2. Grind the spices together into a homogenous coarse powder. If you find it difficult to dry-grind them in your mixie, grind them to a paste using the tamarind water.
3. Heat oil in a pan. Once it is hot, add the mustard seeds and let them pop. Then add the fenugreed seeds. Once they start changing colour, add the asafoetida powder and then the cooked Chana Dal.
4. Add warm water. As I have mentioned before, this Aamti is meant to be thin. So, you could add upto four cups of water. However, I would suggest that you add one cup at a time and check the consistency. If you feel like, add another cup or half and so on.
5. Bring the mixture to a boil and add all other ingredients barring the coriander or curry leaves and the lime juice.
6. Boil the Aamti on high heat for about five minutes.
7. If using coriander or curry leaves, add them just before turning the heat off.
8. Once off the heat, cover the pan for the flavours to blend well.
9. Add a dash of lime juice just before serving. Alternatively, you could serve wedges of lime with the rest of the meal.

Serve Kataachi Aamti warm with rice or phulkas. If entertaining a Maharashtrian guest, try serving this with Puranpoli, and see him/her turning into your slave for life. :) :)

Note:
1. Every Maharashtrian household has its own, slightly-different-from-others' recipe for K. Aamti. This is my recipe, and the Aamti that I make tastes different even from what my mother makes. So, if your Aamti made using this recipe does not turn out like the one that you've eaten before, I'd suggest, that you use this recipe as the base and keep experimenting (mainly with the quantity of the spices) until you think that you have achieved * that * taste.
2. If you don't have Goda Masala with you, you could try increasing the quantity of the spices ground together.

Friday, July 21, 2006

Bitter Gourd & Green Mango Curry

100_6708

One green mango & three bitter gourds

I learnt this curry only last week from my mother-in-law, who has come with my father-in-law to visit us here in Germany. I knew that this time again I'd learn some more recipes from her. It has always been like that. Just when I start thinking that I know all of Konkani cuisine, she comes up with a few dishes that I have never even heard of.

But hey, let me tell you, I too have served her at least a dozen new dishes this time. All thanks to you fellow bloggers. :) Which means that both of us - my MIL and me - have our own little treasure chests now, a drawer of which we open for each other, every time we meet. Isn't it exciting?

Back to the curry now. Bitter gourd and green (unripe) mango is an unusual combination for me. To be honest, I was a little sceptical when I started off. But believe me, if you like bitter gourds and the aroma of garlic, there is nothing that can stop you from liking this curry. :) And it is very very easy to make. You'll know once you see the recipe.

Recipe for Bitter gourd & Green Mango Curry

Serves 3-4.

Ingredients:

3 bitter gourds (Karela)
1 green/unripe mango
½ tsp chilli powder or to taste
3 tbsp jaggery or to taste
salt to taste

1 tsp oil
5-6 cloves of garlic, peeled (Less, if the garlic cloves are fat)

Method:

1. Cut the bitter gourds vertically in half. Take out hard seeds, if any, and discard. Slice the bitter gourds, and put the slices onto a kitchen paper as shown in the picture below.

100_6710

Karela slices about to be wrapped in kitchen paper

2. Sprinkle salt over the bitter gourd slices, and wrap them tightly in the kitchen paper. This makes the bitter gourds * more tolerably bitter *. (I hope you know what I mean. :))
3. Once the bitter gourd slices are dryish (or the kitchen paper is too wet to take any more of their juice), chop the green mango without removing the peel in bite-sized pieces. Do not take the seed, though.
4. Now heat ½ cup water in a pan, and add the bitter gourd slices to it. Cover and cook for a few minutes. Once they are softer, add the mango pieces and cook further. Add some more water (about ¼ cup), if necessary.
5. Once the mango pieces are cooked too, add chilli powder and jaggery. Taste the curry, and add salt, if required. (Please keep in mind that we added salt to bitter gourd slices at Step 2.) Also, please check whether you'd like to add more jaggery.
6. Let the curry simmer gently. At the same time, heat a ladle for Tadka. Add oil. Crush the peeled garlic cloves (but please do not make fine pieces or paste). Once the oil is hot, add the crushed garlic, and let it brown a little. (Your kitchen will be filled with wonderful garlic aroma by now. :))
7. Add the Tadka to the curry and cover the pan immediately. Turn the heat off, and let the flavours blend.

Serve this deliciously bitter-sweet-sour-garlicky curry with phulkas or with rice & dal.

100_6712

'Karaate Ambuli Randhai' (What my MIL calls it)

Note:
For a change, you could also add broken red chilli pieces to the Tadka. You could omit the chilli powder then.

I hope Anthony will accept this 50th post of mine to his Curry Mela. Off to the Bachelor Cooking Blog then. Tschüs.

Tuesday, July 18, 2006

Chutney with Red bell pepper & Ridge gourd peels

100_6706

When Indira blogged about her recipe for chutney with red bell peppers, I knew that I had to make it. It was again one of those recipes where one look at it tells you that you are gonna like it. (And at Indira's blog, you get this feeling after reading every post. :)) However, once I made sure that I had all the ingredients, and started making this chutney, some other ingredients expressed the willingness to be a part of it. :) In other words: I had some ridge gourd peels lying around on the kitchen top at that time. ;-)
What came out was a delicious chutney. (It got over in a couple of hours!) Perhaps it does not taste too different from the original. (Or maybe the original one tastes better!) I am yet to try out the original recipe by Indira. However, what I am happy & excited about is that I used ridge gourd peels, which are thrown away otherwise.

Having said that, I must make it clear that using peels of vegetables in chutneys is not really 'my' idea. It is rather common in the Maharastrian cuisine. (And maybe other cuisines too? Please let me know.)
I like it for two reasons.
A) You benefit from the nutrients, which are in or right under the peel.
B) You generate less waste!!
What you emerge as, after eating this, is a healthy plus environment-friendly person. :)

Before I get tempted into more exaggeration and word-play, here is the recipe. :)

Recipe for Red bell pepper chutney with ridge gourd peels

Ingredients:

1 large red bell pepper, cut into chunks
1 medium red/yellow onion, cut into chunks
peels of 1 ridge gourd
3-4 dried red chillis, broken into 2-3 pieces each
1 tsp oil
¼ cup roasted, peeled & crushed peanuts (I used store-bought roasted peanuts.)
1 tsp readymade tamarind concentrate, dissolved in some water
½ tbsp jaggery or to taste
salt to taste

1 tsp cumin seeds

100_6702

Clockwise from left: chopped yellow onion, chopped red bell pepper, ridge gourd peels

Method:

1. Heat the oil in a pan/skillet. Sauté the first four ingredients in it until light brown. Let cool.
2. Mix all ingredients apart from the cumin seeds in a mixie/food processor and grind till it reaches a smooth paste-like consistency. Add water as you go, if necessary. Take it out into a serving bowl.
3. Heat the same pan that you used for roasting the veggies. Roast the cumin seeds in it until darker in colour and aromatic.
4. Sprinkle these roasted cumins seeds over the chutney. (That's garnishing and seasoning in one! :))
5. Mix the chutney well when serving.

This one is a great accompaniment to any kind of dosas or a side-dish with any kinda meals. What Indira paired it with are these yummy Besan dosas. (Next on my must-try list.) If you want it to be a totally 'green' breakfast (environmentally, that is), serve the chutney with these pancakes by Ashwini, which can be made using the white part of watermelons. Yes, the part which is usually thrown away. (Bye bye, Waste-bin? :))

While I leave you wondering whether waste-bins are really necessary, let me rush my post to Cate for her ARF/5-a-day event and to Nandita for her next edition of Weekend Breakfast Blogging. Bye.

Friday, July 14, 2006

Too Darned Hot: Mirchicha Chatka

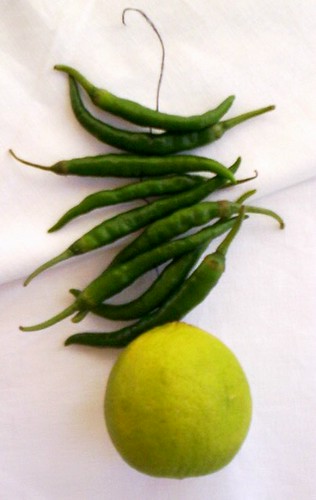
When I saw chillis as the theme for Barbara's event 'The Spice is Right', this image of the non-culinary use of green chillis kept coming back to my mind. For those not in the know: This 'garland'-like thing in the photograph on the left is hung on cars or at the main door of houses/offices in India. It is mainly to ward off the evil and/or to protect the object from jealous eyes. :) I don't know whether it involves *light* black magic or whether there is any scientific explanation behind it. (Although there are rules for making it. Like it can't have just any number of chillis. It should be an odd number like 5,7,9...) I don't really mean to endorse this practise here. It is just that you see it so often at so many places in India that the image gets imprinted on your mind. I am sure, many (or almost all) of my Indian fellow-bloggers and readers will agree with me.

Well, anyway, what I made for this event is a Maharashtrian 'Tondilavane' (chutney-like dish) called 'Mirchicha Chatka'. It is my mother's recipe, and she is 'too darned good' at making it. :)
Now, 'mirchi' is chilli and 'chatka' means a 'burn' in Marathi. That should already give you an idea about this preparation. :) Just in case I am not clear enough, please please please make sure that you don't serve yourself or others more than a teaspoon-full at a time. And please let everybody at the table know that the main ingredient in this one is green chillis...instead of them knowing it the hard way after the first morsel. :) It is still a good idea to keep some water/sweet drink or sugar ready at the table. :) :)

Recipe for Mirchicha Chatka

Makes about ½ cup.

Ingredients:

9-10 green chillis
5-6 tbsp yogurt
½ tsp salt (or to taste)

1 tsp oil
¼ mustard seeds
¼ cumin seeds

Method:

1. Destem and wash the green chillis. Roast (almost burn) them on open gas flame. (Traditionally, they were roasted on hot ambers.) If you don't have gas burners (like yours truly :-( ), bake them for about ten minutes in a pre-heated oven at 180°C. The chillis should turn brown black like in the following picture.


100_6726

Roasted green chillis & yogurt

2. Once cool, mix the roasted green chillis and salt in the chutney attachment/coffee grinder of your food processor and give it just one whirl. We want the chillis shredded in faily big pieces and not churned into a paste.
3. Mix the green chillis and salt with yogurt in a serving bowl.
4. Make Tadka by heating the oil in a pan and letting the mustard and cumin seeds splutter in it. Turn the heat off before the last few seeds pop, because we don't want to add it immediately to the yogurt for it will turn bitter.
5. Once slightly cooler, add the Tadka to the chilli-yogurt mixture. Stir.

Serve 'Mirchicha Chatka' at room temperature and at your own risk. :)

100_6731

Wednesday, July 12, 2006

Crowded vegetables - Gajbaje

100_6673

Gajbaje served on a bed of rice

This dish makes a regular appearance in my in-laws' family on the day before Ganesh Chaturthi. It is a tradition to prepare it as a part of the lavish spread for lunch that day. And the lunch consists of some twenty odd items. All delicious no end rather but time-consuming. However, when all women in the family sit together and work while chatting, all that work does not seem as tedious as it would otherwise.

I made this dish the other day for no special occasion as such. Perhaps the only reason being that summer means a lot of fresh vegetables in the markets/superstores here. Especially when I saw fresh corn-cobs (well, they are actually being sold to be grilled), I knew that I had to make Gajbaje. It's not necessary to use corn-cobs in this dish. For that matter, any and every vegetable from Arvi to Zucchini can be used in it. My mother-in-law often reminds me, when we speak about this dish, that she has made it once with 27 vegetables. (By the way, my MIL has a tendency to add or to subtract as per convenience. Like this dish was made with 14 vegetables when I heard first about it about five years back. :)) However, ever since I have eaten Gajbaje with corn-cobs at our friend-cum-relative, S. Akka's place, I always make it a point to use them in it. What I used apart from corn on the cob is this.

100_6588

Clockwise from left: corn on the cob, ridge gourd, bottle gourd, butternut squash, drumsticks, sweet potato

Recipe for Gajbaje

Serves 4-5.

Ingredients:

5 cups chopped vegetables of your choice

I used:
1 corn cob (I did not count it in the 5 cups.)
1 small sweet potato
¼th of the butternut squash in the picture
1 drumstick
¼th of the bottle gourd in the picture
1 ridge gourd

salt to taste

For the paste:
1 cup grated coconut
1 heaped tbsp tamarind soaked in water (or 1 tsp tamarind concentrate dissolved in some water)
5-6 red chillis, roasted in ½ tsp oil

For the Tadka:
2 tsp oil
½ heaped tsp mustard seeds
10-12 curry leaves

100_6609

Clockwise from bottom left: tamarind, roasted red chillis, coconut, paste made with these ingredients

Method:

1. Wash, peel (where necessary) and cut the vegetables that you are using in bite-sized pieces. Boil just enough water and cook the pieces in it until tender. Please make sure that you add the harder vegetables first and the quick-cooking ones towards the end. I put the vegetables that I used in the same order as they are listed above.
2. While the veggies are cooking, prepare the paste. For this, if using tamarind soaked in water, squeeze out the water from the tamarind, making sure that there are no traces of tamarind shell or seed in the water.
3. Grind the grated coconut with roasted red chillis and tamarind water to a smooth paste like in one of the earlier pictures. Add some more water, if necessary.

100_6611

Cooked vegetables

4. If the vegetables are cooked by now, add salt and stir. Add the paste, stir and bring the curry to a boil.
5. Boil it on medium heat for 3-4 minutes. Turn the heat off.
6. Heat oil in a ladle for Tadka. Add mustard seeds. Once they start popping, add curry leaves. Once all mustard seeds have spluttered, add the Tadka to the vegetables.
7. Cover the pan and let the flavours blend well for some time.

Serve warm with rice and dal or with chapatis.

Loaded with so many vegetables, this post needs to be sent to Cate for her event, ARF/5-a-day Tuesday.

And hey, check out this link for a similar yet different curry.

Sunday, July 09, 2006

Tikhat-Mithaacha Sanja (Maharashtrian version of Upma)

100_6695

Tikhat-Mithaacha Sanja served with Sev

If you go to Pune, and are looking for a place where you could get authentic Maharashtrian breakfast/tiffin items or snacks, make sure you go to 'Janaseva Dugdha Mandir' on Laxmi Road. As the name suggests, they do sell dairy products in a corner of the eatery, which serves as the shop. However, where you want to go is the modest little restaurant (if that is what I want to call it) inside. It is one of those places, where time has stood still. You could be in the year 2006, but that place still has the atmosphere of the seventies. Wooden benches (nope, no chairs) with white turned yellowish laminate covering, an old clock on the wall sharing the space with a blackboard on which the regular items available are written with white paint. (No menu cards here!) The prices are written with white chalk. Well, they can't be painted, because they can change! By the way, the prices too are as down-to-earth as it gets, the most 'expensive' dish costing Rs. 15. :)

There are a few more signs of it being a pucca old-world, 'Puneri' joint. Like the waitors do not hesitate to tell you, if a dish is over. And they don't feel guilty about it; they keep a perfectly straight face. But then hey, they don't accept any tip either. Moreover, there is no tea or coffee available. If you are thirsty, you can order 'Masala Milk' or 'Kokum Sherbet'.
And to satiate the hunger, there are those mouth-watering traditional Maharashtrian breakfast/tiffin dishes like Batata Wada, Sabudana Khichadi or Tikhat-Mithaacha Sanja. The last dish in the list is what I made for breakfast today.

Tikhat-Mithaacha Sanja is the Maharashtrian version of Upma. Sanja, the word on its own, means a sweet preparation made with Rava/semolina/cream of wheat and jaggery. However, when paired with the words Tikhat (meaning hot/with chillis) and Meeth (meaning salt), it means the savoury version. Now, is this version of Upma radically different from the other ones in this category? Well, here's the recipe for it. You could find it out yourselves. :)

Recipe for Tikhat-Mithaacha Sanja

Serves 4.

Ingredients:

1 ¼ cups coarse semolina (known as Sanja/Kesari Rava in Maharashtra)
1 large onion, chopped
3-4 small green chillis, vertically cut into two each
2 ½ cups water
¼ tsp turmeric
¼ cup buttermilk (or yogurt & water mixed to make ¼ cup)
1 tbsp Moong dal, washed (optional)
2-3 tbsp grated coconut (fresh/frozen)
¼ cup coriander leaves, chopped
7-8 curry leaves
1 - 1 ½ tsp sugar
1 - 1 ½ tsp lime juice
salt to taste

1 tbsp oil
½ tsp mustard seeds

2 tsp ghee (optional)
Sev for garnishing

Before you start:

Roast the semolina without ghee/oil until deep yellow in colour. Spread the roasted semolina on a large plate/tray and let it cool. If roasted and stored like this, semolina stays well for months together. Especially in a hot & humid climate like that of India, roasting stops the semolina from catching worms. Also, when roasted semolina is used, lumps do not form in the Upma/ Sanja.

Method:

1. Heat oil in a pan. Add mustard seeds and let splutter. Then add chopped onion and green chilli halves. Cover and cook.
2. Once the onion is soft and translucent, add water, turmeric, buttermilk and Moong dal. Add salt, grated coconut, chopped coriander and curry leaves too.
3. Once the water comes to a boil, add the roasted semolina and sugar. Stir well, cover and cook. In case you see the semolina sticking to the bottom of the pan, leave some water onto the internal sides of the pan.
4. T-M cha Sanja is cooked when all the water is absorbed, and the semolina grains look slightly swollen. Turn the heat off; add the lime juice and ghee, if using. Stir the Sanja well.

Serve it steaming hot, garnished with Sev.

In the meanwhile, I will send this post to Nandita as my entry for her Weekend Breakfast Blogging.

Thursday, July 06, 2006

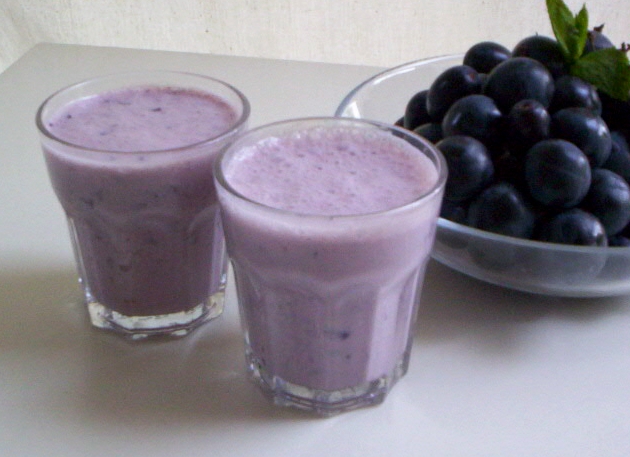
Black Grape Smoothie


It's been really hot for the last few days here in Düsseldorf; the maximum temperatures ranging between 34° & 36° Celsius. Back home in Pune, where the day temperatures would always be between 25° & 40° Celsius irrespective of the season, it was not so shocking to have a harsh summer. However, when you've had 3.5° C during the day for months together, then you look at 35 degrees with a different set of eyes. (Or shall I say 'with a different pair of glasses', since my photochromatic specs are again in use now? Hehehehehehehe....... And yes, I am 'chashmish'. :))

Well, coming back to the heat, what I made to beat it, was yet another Lassi. With black grapes this time. The original recipe is by Tarla Dalal. I have been making this Lassi/smoothie for a few years now. It's an absolute favourite with us. The most attractive part of it being the unusual colour. After all, how often do you come across food that is an appetising shade of lavender?!

Since summer is also the time to enjoy barbeque parties, and since Meeta is hosting one at her blog, I'd like to take my smoothie along to her party. A cool treat to wash down all the goodies hot off the coals. Here I come, Meeta. :)

Recipe for Black Grape Smoothie

Makes 4 small glasses.

Ingredients:

2 cups seedless black grapes
1 cup yogurt
1 cup milk
4 tbsp sugar (or to taste)

ice-cubes or crushed ice (optional)

Method:

1. Blend all ingredients apart from the ice in a liquidiser.
2. Add the ice, if using and serve.

A hassle-free yet tasty and visually appealing drink is ready in seconds. In case you don't fancy biting into stray pieces of grape skin, take only the grapes first, give them a whirl in the liquidiser and strain that pulp before going on to step 1.

Btw, do you know the trick to make easy grape sorbet? Just place some black grapes in a freezer-proof container and freeze them until hard. As a child, I have spent many a summer afternoon biting into those icy grapes while watching some time-pass Hindi movie. In case you try it out and like it, please do let me know. In case you don't like eating those frozen grapes, just throw them into a blender, and make this smoothie. Howzzat? ;-)

Wednesday, July 05, 2006

Blog Patrol # 3 - A Ton Of Protein

It's been long since 'Blog Patrol' came up with a report. However, it deserves to be mentioned that the said party (now, who's that?) has been working on that report. And with a certain theme in mind. What's the theme, you ask? Well, I was coming to that anyway. :)
The theme is 'marriage'. A Marriage (made in heaven?) of two features that make an appearance on this blog. I am sure the title of the post explains the rest.
Fine then, let's see what yummy dishes with protein our fellow bloggers have offered to us so far. Listed in alphabetical order, here they are.

1. Aruchavitta vengaya Sambar by Shammi of Food, in the main... : I had never made Sambar with freshly ground Masala until then. I had heard about it, but that's it. I am happy that I chose this recipe for my first attempt. The Sambar turned out great. I don't know how it is supposed to taste, but I felt that it tasted authentic. (Is that statement contradictory?) And biting into those cooked yet juicy baby onions (yeah, we get them in German shops here) was very very enjoyable.
In case you don't have your own 'family recipe' for this kind of Sambar, just go for this one. You won't regret. :)

2. Bell pepper sambar by Shammi again: What I have got to say about this dish, is something that Shammi has written in her post already. MMMmmmmmmmmmm...... :) :) :)

3. Lasooni Dal Palak by Nandita of Saffron Trail: If you offered this one to your guests, they'd think that you ordered it from a take-away. It's that good. For me, home food is good when it tastes like home food. And typical restaurant food or street food is great when it does NOT taste like home food. I hope you know what I mean.
Well anyway, just try this one out, and you'll know what I am trying to say. :)

4. Mango Dal by Indira of Mahanandi: Do you like unripe mangoes? Do you like the heady aroma of Urad dal in the tadka? Do you like your Dal to be sour and spicy? Do you like it when a dish offers surprises in every morsel?
If your answer is 'yes' to three of these four questions, then just go ahead and make this Dal. Period.
(I am so good at sounding serious about my work, aren't I? :))

5. Mattar Paneer Masala by VKN of My Dhaba: The first thoughts that come to our mind when we see the word 'Paneer' in a recipe are 'fat', 'calories', 'weight gain', 'no no no...'. But let's not forget that Paneer has a lot of protein too. Something that especially vegetarians often do not have enough of in their diet. And as far as Paneer is concerned, it can be made with low-fat milk too.
Now coming to the dish, it is another one with that 'hotel type' taste. Great to put on the table, especially when you are entertaining guests. I assure you, that your guests won't stop singing praises of your cooking skills. :) Thanks, VKN, for this wonderful recipe.

That's it for now, People. See you in a day or two. Ciao!
(No, the last word has nothing to do with the Italians winning the semi-finals yesterday. My loyalties are still with the Germans.)
-cough...choke...cough-

Saturday, July 01, 2006

Puranpoli

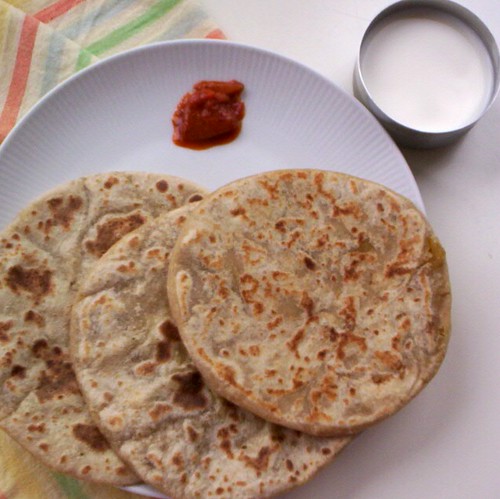
Puranpolis served with pickle and milk

Puranpoli is to Maharashtrians what cheese is to the French. Or locally brewed beer to the Germans. Or Chicken Tikka to the Brits. ;-) Basically, close to the heart. Even the tolerantest of Maharashtrians could resort to violence, if you told them that Puranpoli is a drab little dessert.

I know I am exaggerating. There is a lot many dishes that we are proud of. And not all of them, including Puranpoli, are unique to Maharashtra. It's just one of those things, which we seek pride in. And for anybody to be called a 'Sugaran' (meaning a good cook in Marathi, with its origins in the Sanskrit word 'Sugrihini'), it is one of the essential dishes that she* should be able to prepare. (* This word is used only for women. There is no separate word for a good male cook. Goes on to show that cooking has traditionally always been women's domain.)

Let me come back to the point, after much digression, that last week I tried making Puranpolis for the first time, in order to qualify for the much-coveted title of 'Sugaran', and in the hope to send them as my entry to the Jihva for Ingredients event hosted by Sailu this month. They turned out well. :)
A little about Puranpolis, before I tell you, how I made them.
Puran = any kind of stuffing + Poli = flatbread.

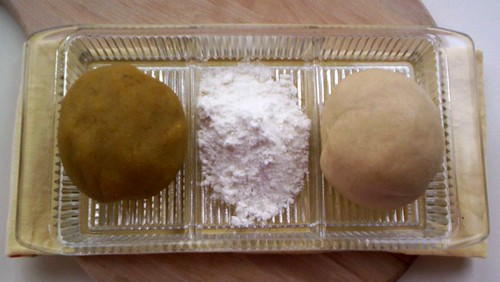
From left to right: Puran (the stuffing), rice flour, kneaded Atta for the cover

Even though any stuffing can be referred to as Puran, the word is often associated only with that used for Puranpoli. Although it is a 'sweet dish', it is not served like a dessert, after the meal. When Puranpolis are made, they are the main dish. Usually, no separate chapatis/rotis are made, and although there are some side dishes served to go with it, they are just to cleanse the palate in between two morsels of the sweet Puranpoli. Usually, we end up eating these side dishes as leftovers in the evening with some curd-rice to help the stomach take some rest. :) (All those side dishes are missing in the first photograph of this post, I know. I was so tired after making the Puranpolis, that I had no energy left in me for cooking anything else. :) Since on the subject, let me also admit that I completely forgot to use ghee to roast the Puranpolis. That did not make much difference to the taste, but I think the cover would have been softer, had I used ghee. I was nervous, you see. :))

Well, enough of theory and story-telling there. I'll now proceed to the

Recipe for Puranpoli.

Makes 5-6 Nos.
(I made only these many because it was an experiment for me. You could scale up the ingredients to make more pieces.)

Ingredients:

For the stuffing:
1 cup Chana dal
3 cups water
2/3 cup grated jaggery
1/3 cup sugar
4-5 cardamoms, powdered
1/8 heaped tsp grated/powdered nutmeg
1/8 tsp salt

For the cover:
1/2 heaped cup chapati Atta
1/2 heaped cup white flour (Maida)
1/8 tsp salt
2-3 tbsp oil

1/4 cup rice flour (or as per requirement) for rolling out the Puranpolis
ghee to roast the Puranpolis (The quantity is entirely upto you.)

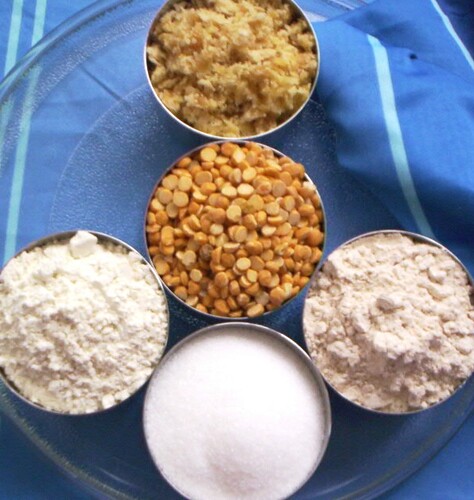
Top: grated jaggery; Middle: Chana dal; Bottom (from left to right): white flour, sugar, Atta

Method:

1. In a heavy-bottomed pan, bring the water for the stuffing to boil. Wash the Chana Dal and add to the water. Let the dal cook uncovered on medium-high heat. Please DO NOT give in to the temptation of pressure-cooking the dal. It makes the texture of the stuffing too runny to handle.
2. In the meanwhile, knead the dough for the cover using 1 tbsp oil and lukewarm water. (You could substitute a portion of the water with milk.) Keep the kneaded, duly covered dough aside.
3. The dal should be cooked by now. It is well-cooked, if a grain of it can be easily pressed between the thumb and the index finger.
4. Turn the heat off. Drain the water on top of the dal into another container. It is called 'kat' in Marathi (pronounced somewhat like 'cut'). Do not discard it. You could use it to thin down any dal or soup. Usually, it is used to make a special dal/Aamti, the recipe for which is coming up here soon. :)
5. Transfer the dal to a food processor now, and grind till all grains of dal have fallen apart. Transfer it back to the heavy-bottomed pan. Add the rest of the ingredients mentioned under 'stuffing' and start cooking it once again on low heat.
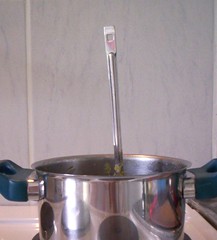
6. The Puran/stuffing will have to be stirred every now and then while cooking, because it tends to stick easily to the bottom. The Puran is cooked when it looks smooth, with every grain cooked and fallen apart. It is thick enough, when a flat spatula inserted in it stands straight. Like this.

A test of well-cooked Puran

7. Keep the cooked Puran aside to cool down. Cover it, if at all necessary, only partly for the steam to escape.
8. Once the Puran has cooled down completely, knead the dough for the cover once again using the rest of the oil. Divide it in five or six portions, depending upon how big you want to roll the Puranpolis.
9. Heat a Tava/griddle.
10. Divide the Puran/stuffing in as many portions as the dough. Roll out one portion of the dough at a time in a small circle. Place a ball of Puran on it. (The ball is usually 2.5 to 3 times bigger than the quantity of dough.) Enclose the cover over the stuffing tightly, and seal it off. Click here for detailed photographs of this step. If you are fairly good at making stuffed parathas, then you should have hardly any problems at this step.
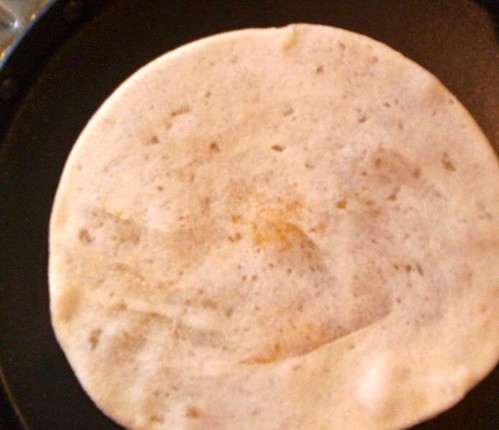
11. Roll out the Puranpoli using some rice flour. The cover needs to become so thin, that you can see the Puran inside. Transfer it to the hot griddle. Roast both sides, using some ghee, until golden brown spots appear. Do not flip the Puranpoli too often.

12. Repeat steps 10 & 11 to make remaining Puranpolis.

Serve fresh and warm Puranpolis with dollops of ghee or with a bowl of milk to dunk it in. At my place, we enjoy Puranpolis with milk, only when they are not warm any longer.

Have these Puranpolis for lunch on a lazy Sunday and take a siesta after that. The feeling of well-being that you get after waking up is too good to be put in words. It is pure Nirvana. Believe me. :)


Tags: , , , , ,

Thursday, June 29, 2006

Mozzarella Salad with Oxheart Tomatoes

100_6648

Oxheart Tomato Salad with Mozzarella

After I published pictures of an unusual tomato in this post, many of you asked me what variety of tomato it actually was. I didn't know then, because as I mentioned in that post, I took the snaps at a friend's place, and she didn't know what they were called. In her comment, our fellow-blogger Linda was kind enough to point out that it could be an 'heirloom' variety. I had never heard of that term, and I definitely wanted to find out what exactly it was. So, I just found myself on the way to the vegetable vendor at the farmers' market in Düsseldorf's city centre one day. The same place where my friend had bought her tomato.

I was lucky. The French veggie vendor had some more of those tomatoes. To be precise, the 'Oxheart' or the 'cœur de bœuf' tomatoes. It is a variey of beefsteak tomatoes. The ones coming into Germany are grown in France. These tomatoes are grown in the USA as well. Has anybody of you come across it? There is this article on it on Wikipedia; it's in German. Unfortunately, there is none in English.

Anyway, after bringing home this tomato, when I cut it, I saw this beautiful pattern of compartments inside. The slices look like flowers, don't they? So, I dropped all ideas of chopping it up. I had to use those pretty slices just the way they were. The only thing I thought of making with it was the simple Tomato salad with Mozzarella. And that's what I made.

100_6646

From left to right: Mozzarella slices, Oxheart tomato slices


Recipe for Mozzarella Salad with Oxheart Tomatoes

Serves 2-3 .

Ingredients:

1 large Oxheart tomato OR two medium regular tomatoes
One ball of Mozzarella cheese (approx. 75g. - 100g. drained weight. I used the low-fat version with 8.5% total fat content.)
a few Basil leaves for garnishing

For the dressing:
2 tsp olive/walnut oil (I used walnut oil.)
a dash of white wine vinegar (optional)
3-4 Basil leaves, torn
salt & pepper to taste

100_6643

Clockwise from bottom left: fresh Basil leaves, tomato, pepper mill, white wine vinegar, walnut oil, salad dressing ready to be used

Method:

1. Cut the tomato(es) horizontally in not very thin slices. Arrange them on a serving plate.
2. Cut the Mozzarella in slices. Arrange the slices on top of the tomato slices.
3. Mix all ingredients listed separately to make the dressing.
4. Distribute the dressing with a spoon evenly over the arranged tomato and mozzarella slices.
5. Sprinkle some salt and freshly crushed pepper over it, if you like.
6. Garnish with some fresh Basil leaves. Serve.

This salad is one of the few dishes, which take hardly any time to prepare, but are full of flavour in every bite. Moreover, if the tomato slices are beautiful to look at, then nothing like it. :)

Since tomatoes are rich in anti-oxidants, I'd like to send this post as an early entry to Cate's ARF/5-a-day Tuesday. Nandita suggests that I should send it to Kalyn for her Weekend Herb Blogging event. So, I shall do that too.


Tags:

Wednesday, June 28, 2006

Do you know your blog-buddies?


When I saw this quiz on spices by Santhi, I thought : Why not a quiz about our fellow-bloggers? Ok, we don't know each other that well, but there are always a few bits of information to be seen in some corners. :)

By the way, before I start, let me make it clear that the questions are not in any particular order. No preference or priority here. I just went on writing as it came to my mind.

If you know who I am talking about, then just leave your answers in the comments section. I'll publish the answers, when the time is right(!). And hey, if I have not included you in the quiz, it's just that I didn't think of anything quizzy. I appreciate you as a fellow-blogger anyway.

One more important thing: Do you really wanna get into the temptation of reading others' comments? (You must have got caught copying in school exams then!)

----------- Spoiler follows ----------------

Ok, then. Get ready for the answers, Folks.

1. If it is weekend, she must be baking. - Pushpa with her Weekend Baking Sessions

2. No, they don't preach Geeta here. It's just a food blog. - Krishna & Arjuna's World

3. Let's see how her lemon pickle turns out in the end. - Manisha. Check out her lemon pickle.

4. He is a ... well, that itself is a clue. Mela kya? Sorry, mila kya? - Tony with his Curry Mela. The only man running a food-blog apart from VKN .

5. She shows us the 'roads' to healthy weight-loss. A weight-watcher's Utopia? - Neelu of Crossroads. http://neelusutopia.blogspot.com/

6. It's two separate bloggers. Both of them have non-Indian partners and both went on separate trips to the US recently. Do you know them? - Meeta and Shammi.

7. She never got to celebrate her birthday in school with her mates. Neither did she cut a cake as we know it. - Ashwini of Food for Thought. Read this post for more info.

8. Her name is Nalyavan. Doesn't sound right? Well, you just have to change your perspective and you'll know it. - Lavannya aka Perspective.

9. She always writes 'without fax'. Sorry, what was that again? - Mythili. She often ends her posts with the words 'without wax'. An important line from this Dan Brown novel.

10. I wonder why she took her turtle-neck sweaters from the US to Mumbai. - Nandita. The answer to this question is here.


Thank you ALL for participating. It was great fun!

Monday, June 26, 2006

A Ton Of Protein # 7 + Nigella Awesome - Dal Fry

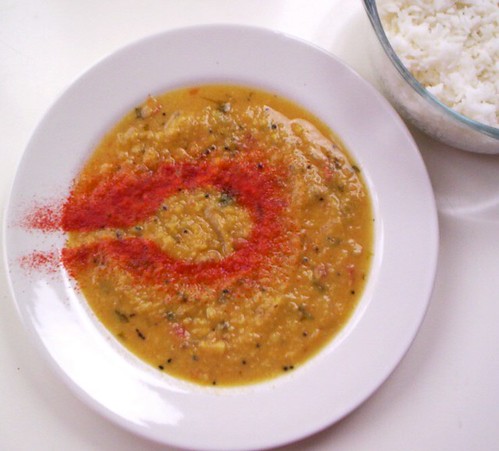
Dal fry garnished with chilli powder

One of my blog-buddies, Ashwini of Food for Thought did an informative post on nigella Seeds (Kalonji) a few days back, in which she appealed to the blogosphere in general to let her know about recipes using this spice, since it is not easy to come across any that easily. As she points out in this post, Nigella seeds seem to be under-appreciated in the Indian cuisine. Or maybe there is a treasure of recipes using this spice, which is just waiting to be unearthed. As our first little attempt at unearthing this treasure, some of us food-bloggers are blogging today about the dishes using Kalonji in our informal event, Nigella Awesome. (A take on the British celebrity cookbook author!) Please feel free to blog about your recipes using this black beauty in the coming days. The event should not end today; let this just be the beginning.

What I have got today is the ubiquitous Dal Fry. This is one dish, which we order each and every time we go out to a Punjabi restaurant in India. Although Dal Fry can taste different at every restaurant, it is one of those dishes which you can always bank upon. The recipe that I use for making this lentil dish is by Tarla Dalal. I follow it exactly the way given by her (which is not quite my style really!), because it turns out really well. With a characteristic earthy flavour of the awesome nigella seeds.

Recipe for Dal Fry

100_6656

Dal Fry shake, anyone? :)

Ingredients:

1 cup red Masoor dal (red lentils in the earlier picture)
¼ cup yellow moong dal (yellow lentils in the earlier picture)
1 green chilli, slit
1 tsp grated ginger
1 tsp grated garlic
¼ tsp turmeric powder
1 onion, sliced
1 tomato, chopped
salt to taste

1 tbsp ghee/oil
½ teaspoon mustard seeds
½ teaspoon nigella seeds (the black seeds in the earlier picture)
1 red chilli

chopped coriander leaves / some butter for garnishing

Method :

1. Wash the dals. Pressure cook them together along with the chilli, ginger, garlic, turmeric, salt and 2 cups of water.
2. Take the chilli out and discard it. Whisk the dal till it is smooth. You could use your hand-held blender for this. Keep the dal aside.
3. Heat the ghee/oil in a pan and add the mustard seeds, nigella seeds and red chilli, once the oil is hot.
4. When the mustard seeds pop, add the onion and sauté till it is translucent.
5. Add the tomato and sauté for another 3 to 4 minutes.
6. Add the dals & 1 cup of water, mix well and bring to a boil.
7. Garnish with chopped coriader leaves or a dollop of butter. In case the Dal Fry is not hot enough for you, you could garnish it with some chilli powder like in my first photograph.

Serve warm with rice/rotis/naan/paratha or phulkas.

100_6664

Dal fry served with rice and a wedge of lime

As their participation to this event, this is what our fellow bloggers have got.

Ashwini : Achaari Baingan
Krithika : Squash Subzi
Priya : Achaari Aloo, Naan, Namakparas
Shammi : Savoury Cheddar cheese biscuits

Check them out!

Jihva for ingredients

Saturday, June 24, 2006

Sakharbhaat (Mildly spiced sweet rice)

Sakharbhaat
(It looks much better than this actually. My sorry camera could capture only 35% of its beauty.)

It is my father's birthday today. Just the way it has more or less become a tradition at my parents' place to make Puranpoli for my birthday, it always used to be kinda predecided that it would be Sakharbhaat for my father's. That was until his high blood sugar levels were detected. Even now, it is us, his family, who are not in favour of this tradition any longer. He would still be happy to find this dessert on his plate. Because he strongly believes that Diabetes is a curable disease, and that his is nearly cured. :) Well, who said that only children can give their parents a tough time? The opposite is equally possible. That is the reason why I have made this dish only as a virtual treat for him. (Technology is not all that bad after all, is it?) I hope he enjoys it. And so do you, when you make it.

A little about this Maharashtrian/Goan dessert: Sakhar=sugar & bhaat=rice. This sweet rice has a wonderful aroma of cloves and cardamom. Traditionally, desserts are always served with the meal itself in Maharashtra (and in many of the Indian cuisines that I know.) So is this one. It is rarely seen at big ceremonies like weddings, at least in the urban parts of Maharashtra. It is a pucca home dessert. And this is how it is made.

Recipe for Sakharbhaat

Ingredients:

1 cup Basmati rice
1 tsp lime juice
1 tbsp ghee
¼ tsp salt
¾ cup sugar
a little less than ½ cup water (for the sugar syrup)
2 cloves
3-4 cardamom pods
1 tbsp sugar (for clove-cardamom powder)
8-10 cashewnuts, halved
saffron strands, the more the better

100_6572

Method:

1. Grind the cloves and cardamom with sugar. You could also pound them with a pestle and mortar.
2. Cook the rice with lime juice, ghee and salt in just enough quantity of water, because we want every rice grain to be separate. (If cooking it in the microwave, add only 2 cups of water for 1 cup rice.)
3. Once cooked, spread it on a wide plate/tray with gentle hands, making sure that the rice grains do not break. I often use a fork for this. Let the rice cool down.
4. In the meanwhile, mix the sugar and water and put it to cook. Boil it until you get thick sugar syrup. It is thick enough, if a drop of it, when put on a metal plate, does not run but stays firm. We call this 'golibund paak' in Marathi.
5. Add the saffron strands to the syrup. Add the cooled rice too and cover the pan. Steam-cook the rice for a couple of minutes.

100_6579

Rice cooking in the sugar syrup

6. Open the lid, stir the rice and steam-cook it for another couple of minutes.
7. Add the powdered/pounded cloves & cardamom and the cashewnuts. Mix them all well with the rice. Cook it uncovered on low heat until all the water has evaporated.

100_6584

Serve it preferably warm or at room temperature. Sakharbhaat is not really enjoyable, if served cold. It tastes even better the following day. I often take advantage of that, and make it on the previous day, when I am entertaining. That helps me gain more time on the day of the lunch/dinner to prepare other dishes.

Note:
Although the procedure looks lengthy, it is one of the easiest desserts to prepare, in my opinion. If you make it once, it is child's play the second time around.

I would like to send this one as my entry to Paz for this month's From My Rasoi event.


Tags: , , ,

Thursday, June 22, 2006

'Confessions in Groups of Five' Meme

I have been tagged by the ever-friendly Nandita for this meme. Thanks, Nandita. I was really looking forward to being tagged for this one.

5 items in my freezer

1. Frozen vegetables
2. Frozen herbs
3. Frozen strawberries
4. Our first tub of ice-cream this year (It's a yummilicious walnut ice-cream with lots 'n' lots of walnut pieces.)
5. Frozen leftovers

5 items in my closet

1. My broken Mangalsutra. My daughter pulled and broke it last December. I haven't gone to India after that. That poor thing is still awaiting repairs.
2. My perfum bottles. Too precious to be kept on the dressing table coz my little one pulls down everything from there.
3. A couple of sarees and Salwar Kameez sets, which haven't seen the light of the day in the last 7-8 months.
4. Lesser number of hangers than clothes. Some of the hangers are carrying three pairs of trousers on them. :)
5. Dust from the lint of clothes. Eewwww...

5 items in my car

1. My daughter's toys
2. Music cassettes - some with Hindi songs, some with nursery rhymes
3. One Europe atlas, one Düsseldorf Atlas
4. Tissue
5. A chewing gum, which is badly stuck to one of the rear mats. I think it came there clinging to somebody's shoe and then just decided to make our car its home. That darn thing doesn't want to come off at all. Any suggestions there?

5 items in my purse

1. My daughter's and my own health insurance cards
2. Several store loyalty cards. I love the whole business of collecting reward points and then dreaming of all the nice things that I'll get for 'free' by redeeming those points. Oh, how I love it!
3. A one rupee note, which has been there for a couple of years now. There was no reason behind keeping it there in the beginning really. Now I have got superstitious about it.
4. My Driving License
5. My husband's visiting card. Just in case I fainted on the road, they should know whom to call up!

I would like to tag Ashwini, Linda, Nila, Pushpa, Shammi and Sumitha for this meme.

Wednesday, June 21, 2006

You guessed it right! - Kohlrabi/Knol Kohl/ Navalkol

You guessed it right, Guys. It is indeed Knol Kohl or Kohlrabi. It is called Navalkol in Marathi. Continuing the discussion on the origin of words, we can again see on this example how a foreign word like 'Knol Kohl' was changed to fit into the local language, and became 'Navalkol'. From the comments to my quiz, I can see that the names for this veggie in other Indian languages are similar (Navila Kosu-Kannada, Nool Kol-Tamil).

As for this vegetable, I have seen that it is not very popular in India (at least in Maharashtra) because it has a strong smell, which many find obnoxious. I remember, I used to be one of the very few ones in my class in school, who used to bring this vegetable for the packed lunch, in their 'dabba'. Having said that, I must mention that it is a popular and much-loved vegetable here in Germany. No wonder then that one of its names, Kohlrabi, happens to be German. (Actually, I feel that the roots of the name Knol Kohl are also German. Knollenkohl, maybe. What do my German-speaking readers think?) However, an interesting fact is that the 'Kohlrabi Capital of the World' is in Michigan, US. Read here more about it.

Well, anyway, what I made with it is a simple Maharashtrian preparation. Navalkolchi Bhaji.

100_6564

Navalkolchi Bhaji served here with wholewheat chapatis

Recipe for Navalkolchi Bhaji

Serves 3-4 as a side dish.

Ingredients:

3 medium sized Kohlrabi
¼ cup Chana Dal
½ tsp chilli powder
a pinch turmeric powder
2 tsp jaggery (optional)

1 tsp oil
½ tsp cumin seeds

chopped coriander leaves for garnishing


100_6551

From left to right: Chana dal, whole peeled Kohlrabi (above) and diced Kohlrabi (below), Kohlrabi peels

Method:

1. Wash the Chana Dal and soak it in ¼ cup water for about half an hour.
2. Peel the Kohlrabi until all the fibre is gone and you have only the smooth flesh. The fibre neither cooks well nor does it taste good. If the Kohlrabi is fresh and tender, then it won't need much peeling. Please refer to the earlier photgraph for this.
3. Dice the Kohlrabi in bite-sized pieces. Pressure-cook the pieces until soft. Roughly, they take the same time to cook as lentils.

100_6555

Clockwise from top: coriander leaves, cooked Kohlrabi dices, soaked Chana dal

4. Heat oil in a pan. Once it is hot, add cumin seeds and let them splutter.
5. Add the soaked Chana dal with the water, turmeric powder and the cooked Kohlrabi and steam-cook it for a couple of minutes.
6. Then add the chilli powder, salt and jaggery. Let the Bhaji simmer on low heat for about five minutes.
7. Garnish with coriander leaves and serve warm with chapatis/phulkas or rice and dal.

Note:
1. Cabbage can be cooked in the same way. Only that it does not require pressure-cooking. It can be added raw with the soaked Chana dal.

Enjoy this vegetable and wish you a Happy Longest Day!

Tags: ,

Monday, June 19, 2006

Do you know this vegetable?

100_6548

Do you know this vegetable? And no, it's not Lady's finger. ;-)

Low-fat Sweet Lassi with a hint of Rose

100_6621

Low-fat Sweet Lassi ready to drink

The mercury has again gone up here in Düsseldorf. It wasn't exactly warm last week, but the weekend has been nice and summery. It has been, yesterday as well as today, bright and sunny. Ideal weather for going to a park or generally doing something outdoors. But you know what? Hubby dear has got hay fever! The doctor has told him : Whenever it is nice and sunny with clear skies and gentle breezes, don't go out. Isn't that sad? :(

Well, anyway, since the World Cup is on, sitting at home is not really boring. And if your hands are holding a glass of a cooling drink to sip onto...hmm, not a bad idea is it? :) What we had today to cool our throats after shouting 'Goal Goal' several times is this Lassi. Easy to make, low-fat and very satisfying. Here is how I made it.

Recipe for Sweet Lassi

Makes 3 glasses.

Ingredients:

3 cups chilled, plain low-fat youghurt (I used readymade yoghurt with 0.1% fat content.)
1 cup chilled water
heaped ¼ cup sugar
heaped ½ tsp salt
½ tsp pure rosewater (not essence)
a pinch jeera powder (for a very subtle spicy hint)

ice-cubes (optional; I did not use any)
some more brown/white sugar to coat the glass rims (optional; only for garnishing)

How to decorate the glasses:

1. Spread the sugar meant for garnishing in a saucer. Take the glasses and wipe their rims with a piece/slice of a lemon. Dip the glass rims in the sugar and let them get coated with sugar crystals. Like this.

100_6618


100_6617


Keep the decorated glasses aside.

Method for Lassi:

1. Add all ingredients to the blender attachment of your food processor/mixer.
2. Blend them together until well-mixed and frothy.
3. Pour into the prepared glasses, add the ice-cubes, if using and serve.

A perfect drink for lazy summery afternoons or evenings!
Barbara of Tigers and Strawberries has been very kind and has accepted this post as my entry to her event The Spice is Right III: The Perfumed Garden. Thanks, Barbara.

Sunday, June 18, 2006

A Ton Of Protein # 6 - Tomatochi Aamti


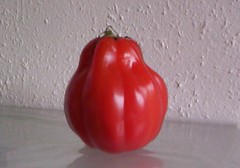
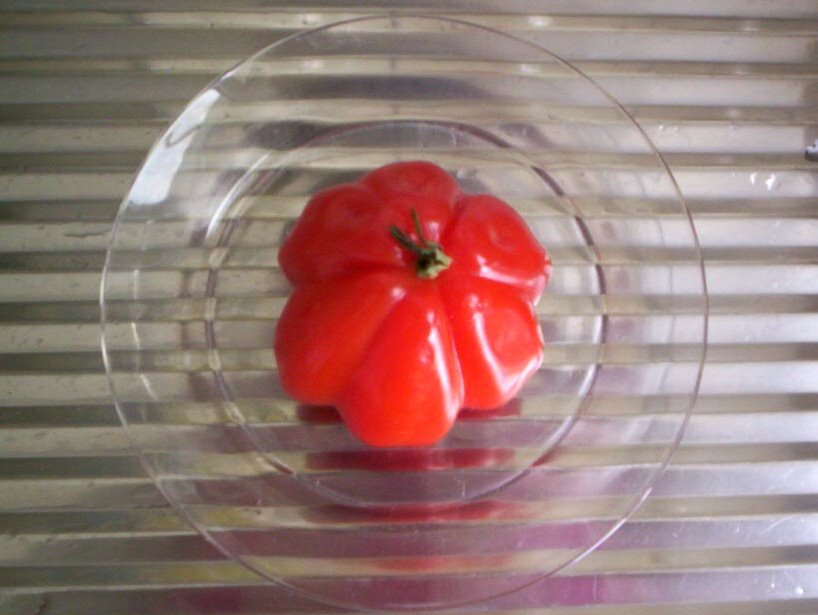
I saw this wonderful looking tomato at my friend Mrs. G's place the other day. Luckily, I had my digital camera with me, so I could photograph it. Isn't it beautiful?

By the way, none of the traditional Maharashtrian dishes ask for tomatoes. None whatsoever. Maybe a proof of the fact that tomato is not indigenous to India? When they are used in a dish, they are often a substitute for some other sour ingredient like tamarind or kokum. Having said that, I must mention that this vegetable (or is it a fruit?) has been accepted well in the Marathi cuisine and the dishes made with it are utterly delicious. One of them is this Dal with tomatoes. It is like any other Dal, which you too must be making every other day. I mean, I didn't really have to do a post on it. But then how else would I show you the photographs of that attractive tomato? It deserved a proper post to go with it, didn't it? So, here it goes.

Recipe for Tomatochi Aamti

Serves 4.

Ingredients:

½ cup Toor dal
1 large tomato (or 2 small ones), diced small
a pinch turmeric powder
¼ - ½ tsp chilli powder or 2-3 green chillis, cut into ½ inch long pieces
approx. ½ cup hot water
a pinch sugar to balance the taste (optional)
salt to taste
chopped coriander leaves for garnishing

1 tsp oil
¼ tsp mustard seeds
¼ tsp cumin seeds
a pinch asafoetida (optional)
7-8 curry leaves

Method:

1. Pressure-cook the Toor dal with 1 cup of water. Mash it well so that no lumps remain. Keep it aside.
2. Heat the oil in a pan. Add mustard seeds. When they start to splutter, add the cumin seeds.
3. Add the asafoetida, if using. Add the curry leaves.
4. Add the green chillis, if using (not the chilli powder, though). Add the diced tomato(es). Please take care at this step, because the oil tends to jump high at this point, and is likely to cause burns. To avoid this, you could cover the pan as soon as the tomato pieces are added.
5. Let the tomato pieces cook a little. Then add the turmeric powder, cooked Toor dal and hot water. If using chilli powder, add it now.
6. Let the mixture come to a rolling boil. Add salt and sugar, and continue boiling the dal on high heat for about five minutes or till it reaches the consistency/thickness that you like.
7. Garnish with chopped coriander leaves. Serve piping hot with rice or phulkas/chapatis.

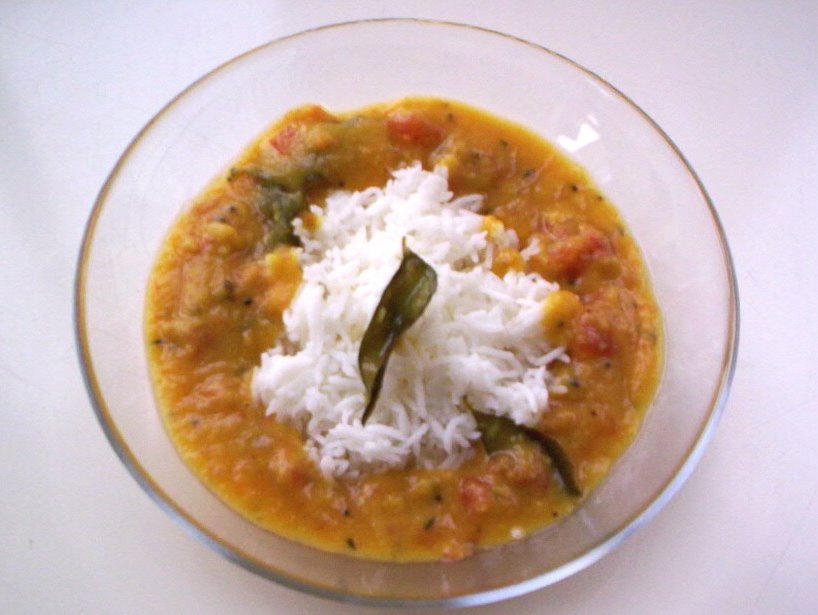
Tomatochi Aamti served with rice

This is one of the simplest Aamtis and can be prepared with the most basic ingredients of Indian cooking. It is one of my favourite ones. However, my fondness for it is nothing compared to the love my cousin, R has for it. He can have it every single day of the year - for lunch as well as for dinner. (That's 730 meals! Omigosh!!)

Anyway, R, this post is dedicated to you.

Jihva for ingredients

Wednesday, June 14, 2006

'Ten dishes I miss the most' meme

Ashwini and Revathi have tagged me for this meme. We are meant to write about what we miss most of our moms' cooking. As I have mentioned here, my cooking is equally influenced by my mother and my mother-in-law. It would be unfair then, if I wrote only about my mom's cooking. Although I have a really looooooong list in my mind, I will try and restrict myself to five of my mother's dishes and five of my mother-in-law's. Let me begin then.

What I miss most of my mom's cooking:

1) Simple everyday subzis: My mother cooks a lot of different vegetables. Hardly any vegetable that is easily available in Pune's markets fails to make an appearance on the dining table, and all of them taste so good. It is thanks to her, that I have always been an 'unfussy' eater.
2) Goda Masala: This essential ingredient in Maharashtrian cooking looks rather easy to make. I have a few recipes for it too. However, my blend of Goda Masala and hence the subzis cooked with it never taste as good as my mom's.
3) Ice-cream: My mother has a simple, no-fuss method of making this without any ice-cream maker. But the kind of ice-cream she makes is divine. You should taste her mango ice-cream - smooth (no crystals whatsoever!), creamy and very mangoey. Baskin-Robbins and the likes can hang their heads in shame.
4) Gulab Jamun: Ambrosia...no jokes! All balls of the same size, with an appetizing dark-brown complexion, cooked to the centre and dunked in a wonderfully aromatic, cardamomey sugar syrup. If I am around while she makes the Gulab Jamun, I eat them in every stage : the raw dough, hot fried balls just out of the pan, Gulab Jamun still warm in the sugar syrup and Gulab Jamun well soaked in the sugar syrup. The Gulab Jamun are never seen around beyond this stage, because they are all resting in my tummy by then.
5) Puranpoli: I love her Puranpoli, and she knows it. So, if I am in town for my birthday, then everybody knows what the menu for lunch/dinner would be. Well, this year too I will not have that pleasure.

What I miss most of my mother-in-law's cooking:

1) NanKhatai: She calls these cookies Narayan Katar. So much for adapting the word to become more tongue-friendly. But the cookies are addictive. No one can eat just one!
2) Coconut Chutney: My ma-in-law prepares various kinds of coconut chutney to go with the yummy goodies for breakfast every day. All of them are too good to resist. When I am in Bangalore at her place, I suddenly forget all my 'healthy eating' fundas and start looking at the good properties of coconut. Cholesterol? What's that?
3) Breakfast: Having mentioned the chutneys, I must say that they are not the only attraction. The daily ritual of breakfast itself is something to look forward to. And mind you, she always prepares it on her own. My help comes into the picture, only when she starts cooking for lunch/dinner. If getting pampered at your in-laws' place is being lucky, then yes, I am lucky.
4) Curry leaves chutney powder: Spicy and yummy! I always get one large bottle full of this, whenever she comes to visit us in Pune or we visit her in Bangalore.
5) Konkani vegetable preparations: The vegetables that make an appearance in her kitchen are very different from what my mother cooks. Her selection is more of typical coastal produce, much of which was unknown to me until marriage. However, it is because of her cooking that I took to all those veggies, the very first time I ate them. I find it great, because bringing in variation in my cooking is quite easy for me, using the double set of veggies (my mum's and my MIL's) that I am familiar with.

Oh God, I just did a preview of this post and my, I have written a pretty long meme, haven't I? Thank God, that neither my father nor my father-in-law ever took any interest (much to their spouses' dismay) in cooking. Imagine how much I would have written otherwise!

I would love to read some more memes, so I am tagging Luv2Cook, Meeta, Mythili, Nandita and Veda.

Tuesday, June 13, 2006

Toasted Sandwiches with Cabbage Bhaji


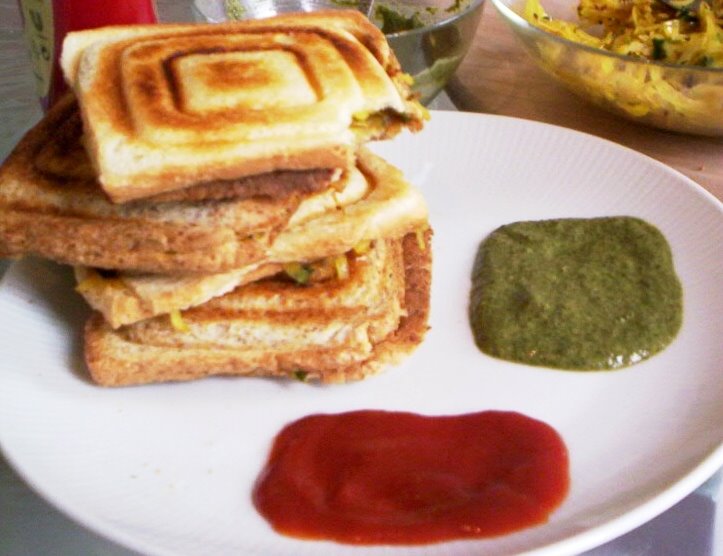
Toasted sandwiches with Cabbage Bhaji served with mint chutney and tomato ketchup

The kind of guessing games we food-bloggers have for each other remind me of Navratri during my childhood. Back in those days in Pune, Dandiya was nearly non-existent for us Maharashtrians. What we as little girls would celebrate was 'Bhondla/Hadga'. During those nine days, each one of us would host it one evening in the garden or on the terrace of our houses. There used to be an elephant drawn either with Rangoli on the soil or with a chalk on a slate in the middle, and we girls used to go around it in a circle, holding each other's hands and singing the Bhondla songs. All the Bhondla songs were traditional, innocent songs passed down the generations. Many of them were funny too.
There used to be a set of roughly ten songs, with a particular song, which was always sung in the end. This song used to end with the words '...khiraapatila kaay ga?' (meaning 'What's for Prashaad?/What is the special dish today?) Now, this is where the food part comes in. This 'Khiraapat' used to be a special dish often made laboriously by the mother of the host girl. Sometimes, it used to be several dishes. The rest of the girls had to guess that dish/those dishes, until which the food would not be served. Our mothers too - very sweet of them - used to come up with rare dishes or combinations, which used to be difficult to guess. I still remember us begging to the host girl to tell us the name of the dish after about half an hour of futile guessing and salivating mouths. However, I used to enjoy it the most when I was the hostess, and I used to so test the girls' patience. (Wicked me!) Those were fun days.

I rarely hear any young girls talking about Bhondla these days. I wonder how many of them even know about it. Are the days of innocent fun gone then? Is it only something like 'Jhankaar Beats Dandiya Nite' that interests them now-a-days?

Anyway, let's come back to our little guessing game with Cabbage Bhaji. All of you were great, I must say. I love the enthusiasm with which you went about guessing the end product. All of you were correct in guessing one important thing : That I used the Bhaji as a filling/stuffing for something. Well, as you must have already noticed, I used it as a filling for toasted sandwiches. Here is how I made them.

Recipe for Toasted Sandwiches with Cabbage Bhaji

Makes 8 sandwiches.

Ingredients:

1 recipe Cabbage Bhaji
16 bread slices (I used some white and some wholewheat bread slices.)
Butter for brushing the outer surfaces of the bread

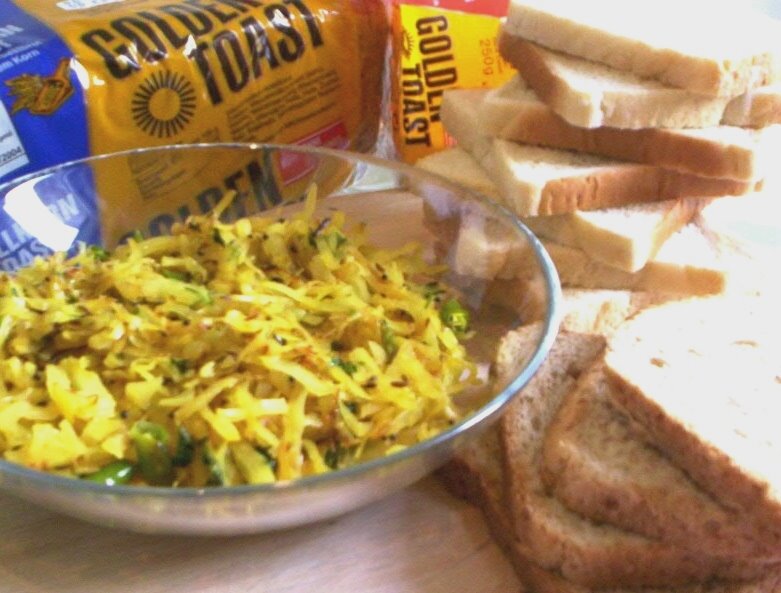
Cabbage Bhaji and bread slices
Method:

1. Remove and discard the chilli pieces from the Bhaji, if you don't want them in your sandwiches.
2. Divide the Bhaji into 8 portions and fill it into the bread slices to make 8 sandwiches.
3. Brush some butter on the outer surfaces of the sandwiches.
4. Toast the sandwiches in a Sandwich Toaster until golden brown. (Normally, the Sandwich Toaster takes care of this part.)

100_6567

Serve these sandwiches hot with any relish/chutney (e.g. mint and coriader chutney) or tomato ketchup. They are perfect for those evenings, when you crave for something 'snacky', but don't want to go for any fried/fatty stuff like burgers or cutlets.

At my parents' place, the Sandwich Toaster used to come out whenever my father used to be away on tour. Us three ladies - my mother, my younger sister and I - would then have such 'harmless junk food' for days together. Sigh, those were the days...

Anyway, let me just come out of that nostalgia mood and send this recipe over to Cate for her ARF/5-a-day Tuesday event. Off to Sweetnicks.