Tuesday, September 26, 2006

Bye to a kitchen...

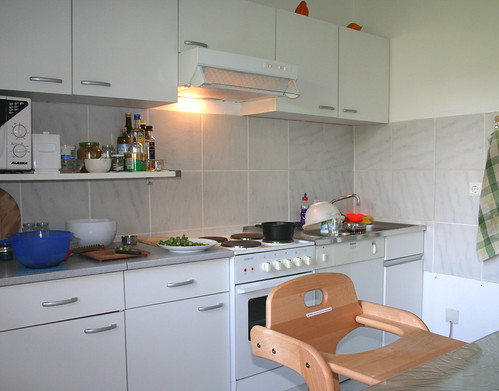
IMG_0054

I am soon going to say 'Bye' to this kitchen. I wonder whether I can say 'Auf Wiedersehn' (See you again!) to the birthplace of many posts on my blog. :(

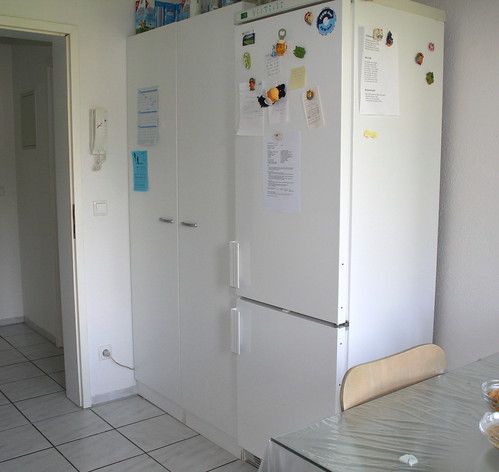
IMG_0055

Don't miss the printout of a recipe and some more scribbled ones on the fridge :)

At the same time, I am looking forward to going back to *our own* kitchen in Pune, which my husband and I designed to suit our needs. The only thing that I won't have in that kitchen is this view.

IMG_0091

These trees are green throughout the year. (Apart from when it snows. Then they look white. :)) The 'green' of them is soothing, isn't it?

Friday, September 22, 2006

Surprise Inside! Jam-in-the-hole Muffins

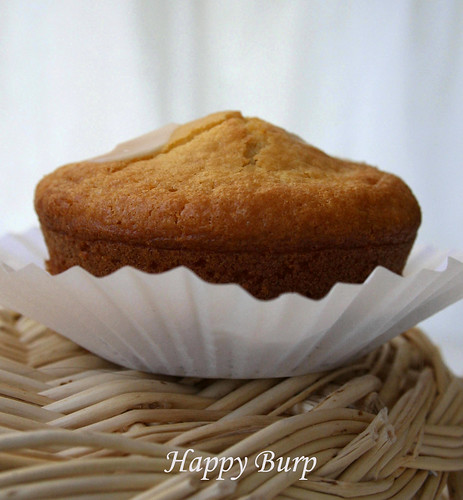
IMG_0082

Oh yes, the muffin does have a surprise inside. If you have read the title of the post, then you certainly know what exactly is inside. :) What you don't know, though, is the other surprise this post has got for you. Well, it's not a surprise really; it's more of a news. And the news is that we are moving back to Pune, India. We had it on our minds since June this year. Then we slowly started working towards it, and now it's already time to pack bags. Literally, because we are scheduled to leave Germany in a week's time. That's soon, isn't it?
Right now, we are in the process of winding up here. Selling/Giving away the stuff that we can't take with us. (If you are reading this and are in the Düsseldorf area, please drop me an e-mail. I am sure you can make use of many things that I have.)

As far as my kitchen is concerned, I am trying my best to use up the stuff, so that I don't have to throw it away. Which is also why my posts these days have different combinations and at times weird recipes. These muffins also had a few diverse ingredients (which weren't there in the original recipe) going into it. For example, semolina. You'll know more when you read the recipe.

I found the original recipe in a 'Cake Special' issue of this German magazine. I was anyway keen on trying it out, and that's when Alanna announced the theme for Sugar High Friday 23: Surprise Inside! When I read the theme, I knew I HAD to make these. Actually, this recipe, with the jam in it, also has a sort of hangover of the previous SHF i.e. No. 22.

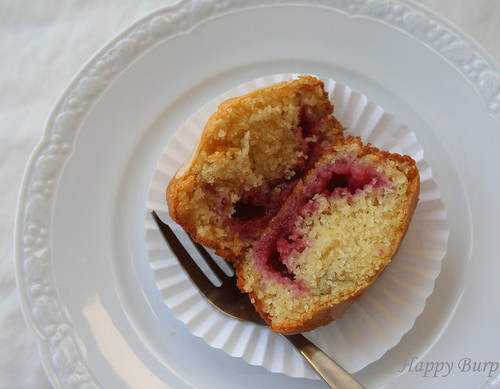
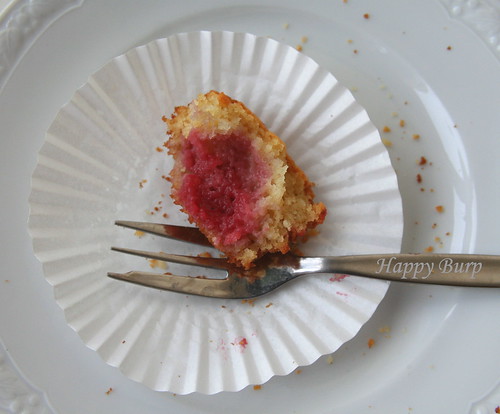
In case you are not one of those, who scrolled straight down to see what's inside the muffin, then here's one picture for you. :)


IMG_0085


Recipe for Jam-in-the-hole Muffins (The original has a boring name: Breakfast Muffins. Yawn.)

Makes 12.

Ingredients:

280g. all-purpose flour/ Maida (I used a combination of flour, cornflour and extra-fine semolina 1)
2½ tsp baking powder
½ tsp baking soda /sodium bicarbonate
a pinch of salt
8g. or about 2 tsp vanilla sugar
60g. butter
1 egg
300g. plain yogurt (That is two of these yogurt cups.)
5 tbsp milk
12 tsp any jam (The original asks for Strawberry Jam. I used one with red currants made by me at home using this recipe by Ulrike.)

Store-bought blanched, slivered almonds for decoration (optional; I used)

Method:

1. Preheat the oven to 180°C.
2. Sieve the flour, baking powder, baking soda and salt together into a bowl. Add the sugar and vanilla sugar to it. (In case you want to use vanilla essence, add it at Step 4.)
3. Melt the butter on gentle heat until just liquidy. I did this in the microwave, in a glass bowl which I later used for mixing the batter. (Economic use of vessels!) Let the melted butter cool a little.
4. Then beat the butter and egg until frothy. You could use your electric beater for this; I didn't. :) To this, add the yogurt and milk.
5. Add the flour mixture to this and stir until just mixed. Let's not forget that these are muffins and not a cake. Which means that you need not use your electric beater here. Just a (wooden) spoon is fine.
6. Line the moulds in the muffin pan with paper cups. I did not do it, and ended up with a few scratches on the pan while unmoulding the muffins. :(
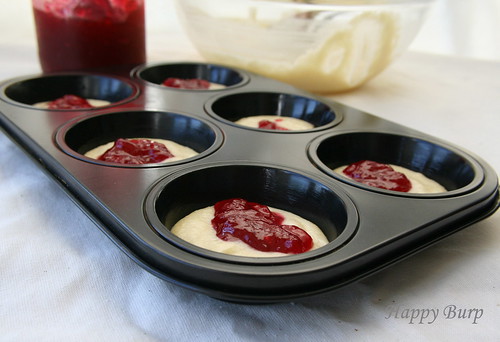
7. Distribute half of the batter in the cups. Place a teaspoonful of the jam on it. Like so.

IMG_0079

8. Distribute the rest of the batter on top and even it out. If using slivered almonds, place them on top of the batter now.
9. Bake in the pre-heated oven on the second rack from below for about 25 minutes, or until a skewer inserted comes out clean.
10. Then take the muffin pan out of the oven and let it cool (preferably on a cooling rack) for 15 minutes.
11. Then unmould the muffins gently and let them cool further on the cooling rack.

Enjoy the muffins with a glass of milk, if you like. Perfect for brunch. Or as an after-school treat for children. Please make sure that you store them under lock and key, though, because they disappear fast. Here's proof. :)

IMG_0086


Notes:

1. Sorry, I cannot give you the measurement of the flour in cups because I did not have enough flour. I used cornflour and extra-fine semolina as well. I just made sure that all of it together weighed 280 grams. Why did I use different flours? See, this is why you shouldn't have scrolled down straight to the second picture without having read the introduction. :)
2. We call the extra-fine semolina 'Zero number Rawa' in Maharashtra. Elsewhere too?

Tags: , , , ,

Wednesday, September 20, 2006

Can you guess the main ingredient? - Polenta Idlis

IMG_0075

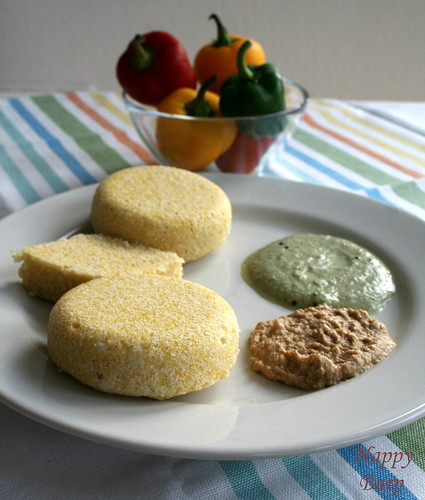
Cornmeal Idlis served with No-Coconut Chutney (green) by Asha &
Peanut-Onion Chutney (brown) by Latha

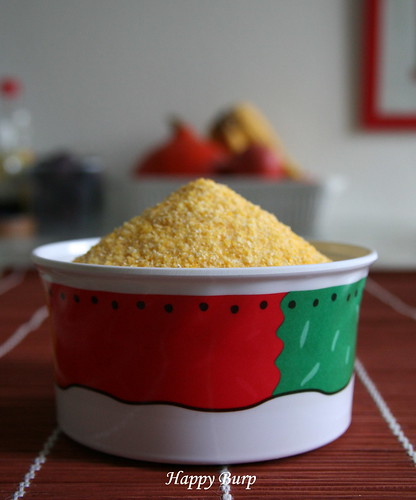
You guessed it right!!! Are you smart or are you smart?! It is indeed coarse cornmeal or Polenta or Makai ka Rawa. I was sooooo sure that it was hard to guess. (Meaning: I would have never guessed it right, had this been a guessing game on someone else's blog.) Well, I underestimated you, Darlings. :)

IMG_0061

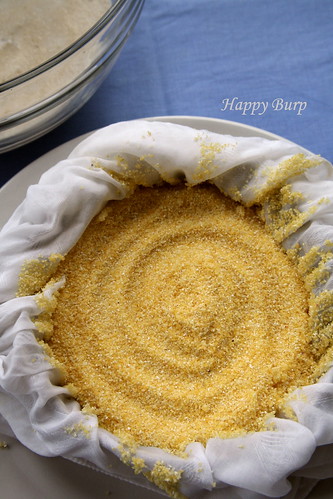
Coarse cornmeal / Polenta/ Makai ka Rawa

The recipe is quite simple. I just followed a recipe for Urad Dal-Semolina/Rawa idli that I have got from my mother-in-law. Why did I use Polenta then? Well, I bought it a few months back because I wanted to try making (guess what!) Polenta, the Italian staple. Somewhere down the lane, I totally forgot about it. When I found the pack of Polenta again, I just instinctively wanted to make Idlis with it. (This happens just too often to me, don't you think?) So, Idlis is what I made with them. Here's how.

Recipe for Polenta Idlis (Or Rawa Idlis, for that matter)

Serves 4. (No point in giving the number of Idlis here. As you can see, mine are the 'giant' versions.)

Ingredients:

1 cup Urad Dal
2 cups Polenta (or wheat Rawa/ semolina)
1/2 tsp Methi/ fenugreek seeds (optional; I always use)
water, as required
salt to taste

Method:

1. Soak the Urad Dal and Methi seeds (if using) in water for approx. 8 hours or till a point, where you see tiny bubbles on the water (and the Urad Dal starts giving a slightly unpleasant smell).
2. Then grind it to a fine paste. By fine I really mean fine. Leave it again to ferment; overnight, if you plan to make Idlis for breakfast the following morning. If you are left with some of the water in which the Urad Dal was soaked, keep it aside too. It will be useful in making the batter thinner, once the Polenta/Rawa is added.
3. In a piece of cloth as big as a handkerchief, tie the Polenta or Rawa in a bundle. Put this bundle in a vessel and steam it in your pressure-cooker / steamer for about 15 minutes. Like so.


IMG_0071

Steamed Polenta

4. Take the bundle out and let it cool. Once cool, add it to the fermented Urad Dal batter. Add salt and mix well. The batter should be the consistensy of Milkmaid condensed milk. (Do you Guys think of another equivalent?) If the batter is too thick, add the Urad Dal water that you have kept aside the earlier evening.
5. Oil the Idli stand/cups in which you want to make Idlis. I usually use steel bowls/Katori (Hindi)/Vaatya (Marathi) because I don't have my Idli stand here. You can see those bowls here and here.
6. Steam the batter in a pressure cooker/steamer for 10 minutes. Take the stand/bowls out and wait for about five minutes. This makes unmoulding them easier.

Unmould Idlis and serve warm with chutney or Sambar. As you can see in the caption for the first photograph, I served them with two chutneys blogged by Asha and Latha.

I would like to send this post to Nandita's Weekend Breakfast Blogging. Let's see what she says. :)

Tags: , , , , , , , , , , ,

Tuesday, September 19, 2006

Suspense...

There was a hissing sound coming out of the chamber. As though something were trying to escape through a hole. I went closer. There was a knob. I turned it. The hissing sound started dying, a little at a time. Then it stopped.

I opened the chamber. A strong smell hit my nostrils. Strong and overwhelming. I stretched my hand to touch what was inside…sssssss…I pulled it back with a jolt. I had burnt my finger.
I waited. I was not going to give up.
After a few moments, I touched it again, and pulled it out quickly. It made a ‘thud’ and rested. The smell still emanating from it, but no more sound.

I knew I had to do something. I knew it. I reached out for a knife. Yes… a knife is what I needed. I looked at ‘it’ with the knife in my hand. “Is it time?” I asked myself. I had burnt my finger once. Then...something in me said “Yes”. I held the knife firmly and dug it into ‘it’. I took it out and dug it again…and again…and again…until…


…until I had unmoulded all Idlis from the stand.

Monday, September 18, 2006

My Latest Kitchen Acquisition and Pasta with Ricotta & Mushrooms

100_6252

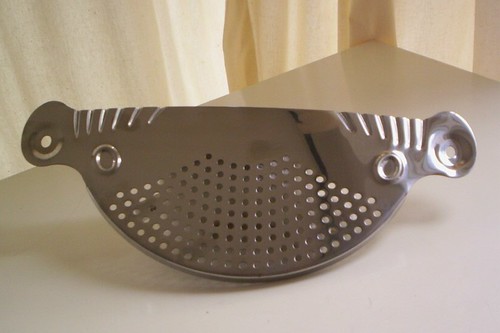
This kitchen tool is my latest kitchen acquisition. It helps you drain water from the pan after you cook 'Pasta'. What you do is that you hold it at the upper rim of the pan as though it were the lid. The *wings* on its two sides help you hold it with the handle grips of the pan. You hold the pan and the perforated *lid* on the sink, as away from you as possible, and then drain the water. Which also means that you do not have to use a colander for that job. The pasta can stay in the same pan in which it was cooked. Isn't it handy?

Since it is so good, I put it to use immediately as well as frequently and made a few dishes with pasta, which will feature here in the next few weeks. Today is the lucky(!) day for

Spinach Tagliatelle with Ricotta & Mushrooms
(I found the original recipe in German here.)

Serves 2-3.

Ingredients:

250g. Ricotta Cheese
300g. Tagliatelle (I used the ones with spinach. You could use plain noodles too.)
200g. mushrooms, sliced thin
4-5 fat cloves of garlic, chopped fine
2 tbsp olive oil
Parsley or any other herb (I didn't use any.)
1 tbsp tomato paste (optional; not in the original recipe)
about 1/4 cup milk (I used white wine instead. Hic.)

salt and pepper to taste

Method:

1. Take approx. 3 litres of water in a pan and put it to boil. Add a little salt to it. (I often add a vegetable stock cube instead; that gives the pasta some more taste of its own.) Once the water starts boiling, add the pasta and cook on high heat. The time taken to cook the pasta 'al dente' is normally written on the pack.
2. In the meanwhile, heat oil in a pan. Sauté the chopped garlic and sliced mushrooms in it.
3. Stir the Ricotta cheese with the milk/wine to make it smooth and slightly thinner. Pour it over the mushrooms. Add the tomato paste, if you like. I add it to give the sauce a nice tang.
4. Add salt and pepper to it and cook on very low heat. If using any herb, add it now.
5. By now the Tagliatelle should be cooked. Drain the water from it. (This is where my new baby comes in handy. :))
6. Serve the cooked Tagliatelle onto individual plates. Pour the creamy Ricotta sauce over it. Sprinkle some more pepper over it, if you like.

Serve with a salad on the side.

100_6605

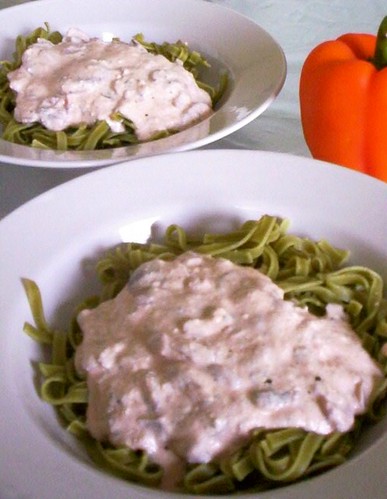
Green Tagliatelle with Ricotta & Mushrooms

(By the way, I bought the tool and also took the photographs in this post before I got my new camera. So, the pictures aren't as great as I'd love them to be. Clicking them all over again could have been an option, but I am too lazy for that. :( )

And no, this post isn't being sent to any event. Isn't that strange?

Tags: , , , , ,

Friday, September 15, 2006

Pumpkin Walnut Cake

IMG_0046

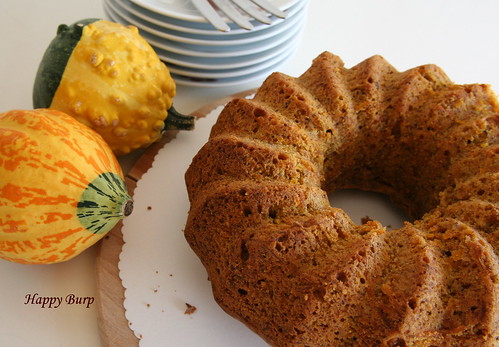
Pumpkin Walnut Cake

Did you know that pumpkin is a berry? The largest berry, actually. I didn't know that until I started looking for more information on pumpkins. Why did I look for more information? Because Meeta has chosen it as the theme for this month's From My Rasoi. A very apt theme for the month of September, isn't it? (Having said that, I must mention again that pumpkins are available in India throughout the year and not just around Halloween.)

What I learnt more about pumpkins is that they were around even 12000 years ago, and were very much a part of man's diet in the Ice Age. They are supposed to have originated in South America. (Which makes me think that every second fruit or vegetable that I know has its roots in the Americas. What in the world did our ancestors eat before the 'New Land' was discovered?)
Also, how did they make many of the Indian string instruments before that? If I am not wrong, it is dried pumpkins that they use in making them. e.g. Sitar or Veena. Actually, the main chamber in them is called 'Bhopla' in Marathi or 'Kaddu' in Hindi. Both are words for pumpkin in those languages. That asks for another 'Google search', I guess. :)

IMG_0031

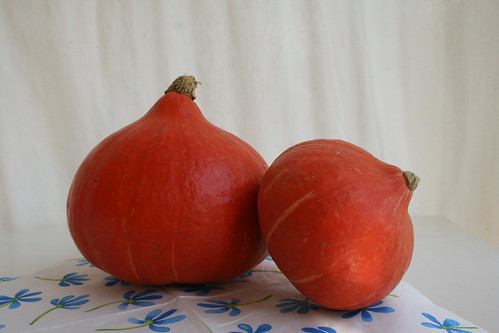
Hokkaido pumpkins

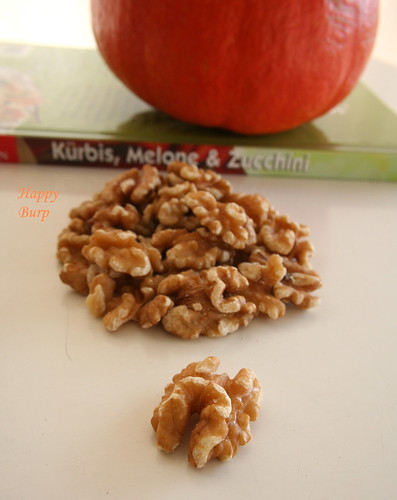
As for today's recipe, I didn't really have to do a 'search' for it. Because I found it in a German cookbook that I had borrowed from the library, after I saw the first pumpkins in the markets here. :) This book is dedicated to only pumpkins, squashes and melons. All from the same family. Some of the recipes in this book looked far-fetched to me; maybe included only to make the list of recipes longer. For example, Melon Soup with Pesto. Doesn't sound too great to me. I am happy eating melons as they are.
However, this recipe with pumpkin and walnuts turned out wonderful. And what aroma...ummmm...! By the way, I used a Hokkaido pumpkin for it. As you can see in the pictures in this post, the skin as well as flesh are bright orange. Which indicates high carotene content. That is also the reason why they are preferred in making bottled baby food. Apart from the sweet and nutty taste, of course. The name of this variety hints at its Japanese roots. However, I haven't managed to find out more about its origin. Maybe one of you knows?

IMG_0039

Recipe for Pumpkin Walnut Cake

Makes a fairly large cake. (Mine weighed 870 grams.)

Ingredients:

300g. or 4 loosely packed cups grated pumpkin
75g. or 3/4 cup powdered walnuts
1 egg
100 ml. or 1/3 cup oil (I used sunflower oil.)
250g. or 2½ cups all-purpose flour/Maida (I used 150g. flour and 100g. cornflour. Only because I wanted to use up the rapidly-aging cornflour.)
200g. or heaped 3/4 cup sugar (I used soft brown sugar. For the same reason as above. :))
1/4 tsp salt
1 tsp powdered cinnamon (I used store-bought.)
1 tsp vanilla sugar
1 heaped tsp baking powder

butter/oil to grease the mould (I didn't use any. It's a silicone mould.)
powdered/icing sugar for dusting (optional)

IMG_0041

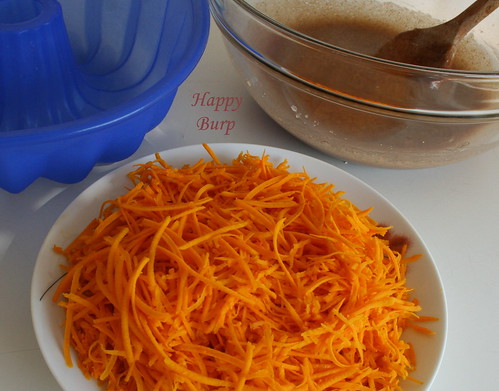
Clockwise from top left: silicone Bundt mould,
batter for cake getting ready, grated pumpkin waiting to be a part of the batter
:)

Method:

1. Pre-heat the oven to 180°C. Grease a cake mould and keep aside.
2. Separate the egg : the egg white into a small bowl and the yolk into a bigger bowl, which you will also use for mixing the batter. If you are not confident of separating the egg only with your hands, you might want to invest in a separator, like Shammi.
3. Stir the egg yolk, sugar, vanilla sugar, oil and cinnamon until mixed well. Add the grated pumpkin and stir again.
4. Sieve the flour, baking powder and salt into the bowl. Then add the powdered walnuts to it. Stir the batter well to mix all ingredients.
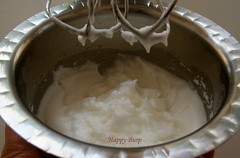
5. With an electric beater, beat the egg white to resemble firm snow. Like so.

IMG_0043

6. Add this 'egg snow' to to the batter and stir gently.
7. Pour the batter into the prepared cake mould and bake for about 50 minutes. The cake is ready when a knife or skewer inserted in the middle of it comes out clean. (You don't really have to think to write this sentence, do you? :))
8. Once the cake is done, turn off the oven (Duh!) and take out the mould. Let the cake cool in it for 10 minutes.
9. Then unmould it onto a cooling wire rack. Once cooled, you could dust it with some icing sugar. I too did after taking the photograph. :)

Make this for you Halloween party and see all *ghosts* gathering around the table. ;-)
In the meanwhile, I'll go call Meeta to have a look at it. :)

Tags: , , , ,

Thursday, September 14, 2006

Things to Eat Before You Die (, although I don't want you to die really.)

The Traveller's Lunchbox has come up with this idea of compiling a list of a food-bloggers' top picks. It is about things you've eaten and think that everyone should eat at least once before they die. Sounds nice, doesn't it? Thanks a lot, Mandira, for tagging me.

Since I grew up in Pune...or as my husband once said, since my life has always revolved in a radius of 3 kilometers in a certain part of Pune, all my food memories and longings are connected to this city, that I call my home. (By the way, I am sure you have noticed that I wrote '...my husband once said...'. He is being punished so severely for that one occasion that he will perhaps never say that or anything alike ever again. Trust me. :))

Following is the list of foods or food destinations that I keep going back to. And I will do so until the last breath leaves my body. (What melodrama! Straight out of a Hindi tear-jerker. :))

1. Mango Ice-cream at Buva Ice-creamwale: Yummy yummy yummy ice-cream. It's a modest place in the heart of the city. (Near 'Udyan-Prasad' Mangal Karyalay, for those interested.) The decor inside hasn't changed in the last 30 years (that's how long I have been going there). Neither have the people. Most important of all : The taste hasn't changed. It is still the same taste and texture that I have in my oldest of memories. I am looking forward to making more memories there with my grandchildren. :)

2. Bedekar Misal: This is another one of those old-world joints in the heart of Pune city. If I am not wrong, the restaurant has a different name. I don't remember it, because everyone calls it Bedekaraanchi Misal. Now, Misal, as the name suggests, is a dish made by mixing lots of things. You can see the recipe for it here. But you know what, don't bother making it at home. Just pay a visit to Pune and have it at Bedekars'. You will regret, if you don't. :)

3. Shrewsbury Biscuits by Kayani Bakery: This is an item that many non-Puneites too know of. These famous biscuits make a perfect gift to take home, if you are visiting the city. Only that you have to make sure that you are at the bakery by 7 a.m., if you want to make sure that you get them. :) Read more about the bakery and the biscuits here.
The one thing that I'll want to do before I die is: Sprawl on the sofa in the living room at my parents' place, my sister beside me, both of us giggling like mad without reason, MTV playing on TV, and me munching on Shrewsbury biscuits. BLISS.

4. Kajukand: This is again something that memories are made of. When I was a child, my father used to bring me these sweet, pink squares made of cashews, sugar and with a hint of rosewater. These candies are healthier and cheaper, no doubt. They are also very simple, true-to-the-earth. For me, a symbol of the simple, middle-class life that we had. A life devoid of brands, luxury or affluence. Something that you don't really go looking for in supermarkets. It's the traditional-looking Maharashtrian shops that sell those. Try them out. You'll like them.

The last item on the list is purely a personal pleasure.

5. Tea made by my husband: You would perhaps not find anything special in it. Or maybe you would. Me, I'll want to have it till the last moment. The very last one.

I'd like to read what Anupama (I always tag her, don't I?), Linda and Mythili want us to eat before we die. :)

Wednesday, September 13, 2006

Away from the grind : Didir Dosa

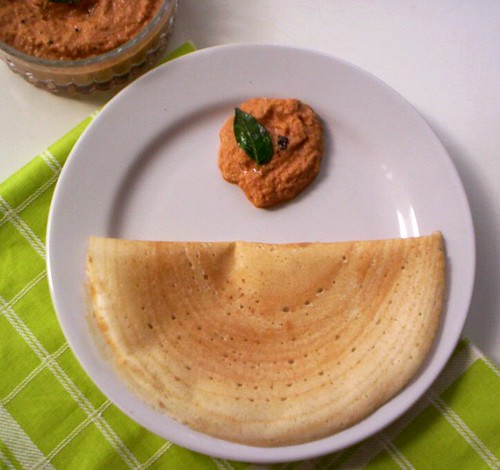
100_6847

I bought some Urad dal flour back in January. I bought it because I had read a recipe then, which required it. After some days, when I again saw the recipe to make that dish, I realised that I didn't really fancy making it. (Does this happen to you too?) As a result, the Urad dal flour stayed in the pack, unopened, at the back of the cabinet...until I saw it again, when I emptied the cabinet to clean it thoroughly. This time I was determined to use it, and started looking for recipes on the net.

This thing called the internet is perhaps one of the best things to have happened to mankind in the recent years. (Now that was a 'pearl of wisdom', Maa Vaishali Devi!) Although I did not find too many recipes, which ask for Urad dal flour (perhaps there aren't too many anyway?), the one that I found is reeeaaaally good. It is for this Dosa, Didir Dosa. I found the same recipe at a few sites. The one site, which I like the most, is this. The only thing that none of the sites told me is *why* the Dosa is called so. I am sure that one of you will know. :)

This Dosa has two very good qualities.
1) It requires no grinding at all. Which means that bachelors or people on the move or people who are just starting a household and do not have all the kitchen gadgets yet can also make great Dosas.
2) Moreover, the no-grind batter gives you perfect Dosas. I think the pictures are proof enough. :)

The recipe is very uncomplicated too. Let me tell you how.

Recipe for Didir Dosa

I do not really remember how many Dosas I made, but it made four adults so full that they almost skipped lunch. :)

Ingredients:

3 cups rice flour
1 cup Urad flour
salt to taste
water for the batter

oil for the griddle/Tava when making Dosas

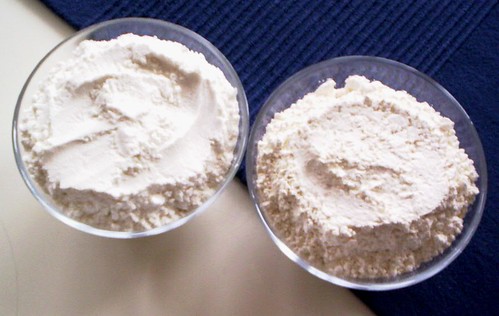
100_6821

Rice flour & Urad flour - Can you tell which is which? :)

Method:

1. Mix both flours and salt. Add enough water to make a soft, lump-free paste. Please make sure that it isn't too runny.

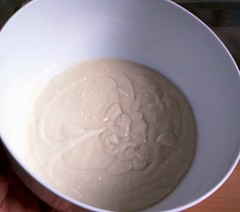
100_6823

Batter to be fermented yet

2. Leave the batter to ferment for at least 8 hours or overnight. Once the batter rises, check the taste again for salt.

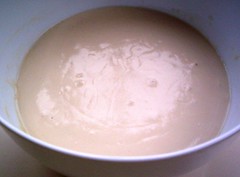
100_6824

Risen batter

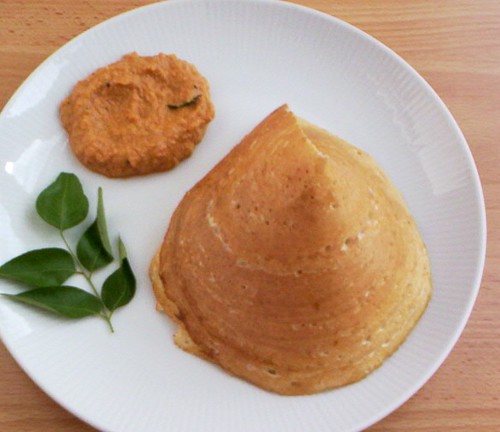
3. For making Dosas, heat a Tava. Pour a ladleful of the batter in the centre and spread it with the back of the ladle moving in concentric circles. Spread a few drops of oil at the edges of the Dosa. For step-by-step fotos, see here. Once the edges of the Dosa start *lifting themselves* from the Tava/griddle, slide a spatula beneath it, fold it in half and take it out.

If you want to serve it like the 'Topi Dosa' that they serve in Udupi restaurants in India, make one cut in the Dosa from the centre through to the edge. Fold it with both hands to make it look like a party hat. Like this.

100_6851

'Topi' Dosa

Serve it with this chutney or any other chutney of your choice. I served it with this.

I'd like to take this 'hat' along to Nandita's. For her Weekend Breakfast Party...er...Blogging. :)

Saturday, September 09, 2006

Another Meme!

100_6866_0001

Trappeto Beach. You wanna be there, don't you? :)

Thanks for tagging me, Nabeela. I love writing memes. :)
I am thinking about: at least ten other things right now.
I said: too many mean things to my husband during the first year of our marriage. :(
I want to: lose at least 10 kilograms.
I wish: I could paint and sing.
I regret: not having studied with enough dedication.
I hear: the dishwasher in the background as I am writing this.
I am: Vaishali.
I dance: with my upper body when I hear a catchy number on the car radio.
I sing: to my daughter to put her to sleep. Difficult to believe, but I do.
I cry: easily.
I am not: as snobbish as I appear to be.
I am: still Vaishali. How many more times do I have to tell you?
I write: my grocery lists in Marathi.
I confuse: between 'paraan' and 'pairi', the words for day-after-tomorrow and day-before-yesterday in Konkani.
I need: to get rid of my habit of procrastinating things.
I tag: Anupama.

Friday, September 08, 2006

Spaghettini with Zucchini / Bottle gourd and its leaves

100_6884

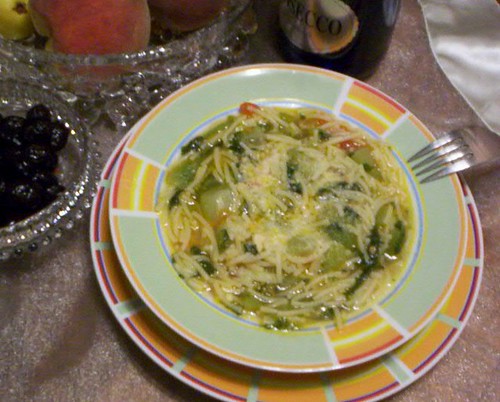
Spaghettini with Italian bottle gourd and its leaves
It needs to be eaten with a spoon.
I realised this only after I clicked the photo with a fork on the side.
:(

You might think that I am crazy about bottle gourd. Considering my latest posts, you have reason enough to. However, to be honest, this one is just a coincidence. Well, let me begin from the beginning.

As you know, I went on a holiday last week. As many of you guessed it right here, it was Italy. More precisely, Sicily. ('Mafia' is the first word that comes to your mind? You are a well-read person then. :)) We stayed in the village of Trappeto, which is a part of the Palermo province. We went there on an invitation by this Italian friend of mine, Nina. She has a house there; it's her hometown. Although she is very much a resident of Düsseldorf for over forty years now, she enjoys staying in Sicily in the summer months. I don't blame her; Sicily is indeed beautiful. Will write more about it in another post.
One of the highlights of our stay there was Italian food. Home-made as well as restaurant-made. What I observed was that, like in India, in Italy too home-cooked food is quite different from restaurant food. Until then, I somehow very naïvely thought, that Italians cooked at home what they served in restaurants, or vice versa. But no. I found the home-cooked food much less spicy and much more wholesome. Like this dish. It is a perfect one-dish meal with a good amount of carbs, fibre, Vitamin C and lots more goodness in it. You'll agree when you see the recipe.
Before that, a few notes:
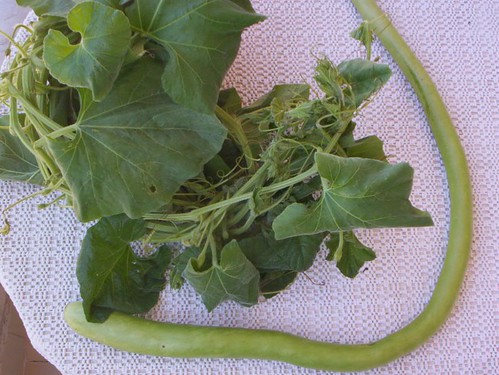
The 'Zucchini' that is used in this dish is actually bottle gourd in a different shape. (Maybe we could call it bottle-snake-gourd-zucchini. Or better still, zucchino, because that is the singular!) What they mean, when they call something a zucchino in Sicily, is this bottle gourd. The dark green zucchini that we know, are not to be seen there.
Also, the leaves are of the same vine, on which this gourd grows. They are sold regularly at the vegetable vendors there. Since I was sure, that I wouldn't find them easily outside Sicily, I asked Nina for a substitute. Well, there is no substiute really. Unless you want to try it out with spinach, she says. I haven't tried making this at home with spinach yet. Maybe you want to?
Besides, the Spaghettini that we used in this dish is like Spaghetti, but with slightly thinner and much shorter strands. If you don't have it at home, feel free to break regular spaghetti in 2-inch long strands. For this, you just have to hold the bunch of spaghetti that you want to use vertically in both hands and give it several twists. What you get is Spaghettini. Simple? :)
100_6876

What they call zucchino in Sicily (R) and its leaves (L).
Only the smaller, tender leaves were used in the dish.

Recipe for Spaghettini with Zucchini/Bottle gourd and its leaves

Serves 5.

Ingredients:

One long Italian bottle gourd or a medium-size regular bottle gourd or two small dark green zucchini, as we know them
Leaves of the bottle gourd vine (Only the tender ones at the tip should be picked.)
250 g. Spaghettini (or spaghetti crushed as explained above)

2-3 tbsp olive oil
7-8 cloves of garlic, peeled and cut
4-5 tomatoes

water for cooking
salt & pepper to taste
grated Pecorino or Parmesan cheese to sprinkle

Method:

1. Coarsely chop the tender leaves picked from the bottle gourd vine. Soak them in salted water for the tiny insects/worms to settle at the bottom. In case using spinach, first wash the leaves with plain water and then chop them coarse.
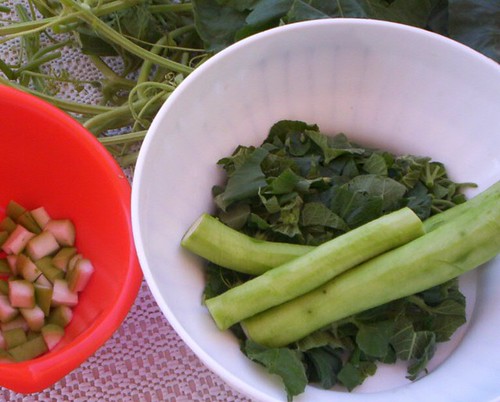
2. Peel the bottle gourd/zucchini. In case you are wondering what to do with the peel, see here. Chop it in bite-sized pieces.
100_6877

Left to right: chopped bottle gourd, peeled bottle gourd and
picked & chopped bottle gourd leaves

3. Take the leaves out of the salt-water solution and give them a quick rinse.
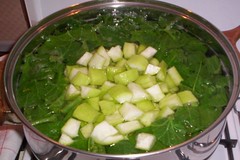
4. Take lots of water in a large pan and bring it to boil. Then add the leaves as well as the chopped zucchini to it.
100_6879

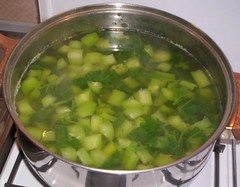
5. Cook uncovered until the zucchini pieces are soft.
100_6880

6. Drain the cooked vegetables reserving the water in which they were cooked.
7. Now place the tomatoes in a shallow dish and pour some boiling water over them. Let them rest like that for a couple of minutes, then take them out into a plate and peel them. The peel will come out easily. Roughly chop these tomatoes.
8. Heat the oil in a pan. Add the garlic pieces. Once they turn a shade darker, add the peeled, chopped tomatoes and salt. Cook uncovered on high heat. Mash it with the back of a ladle while it is cooking.
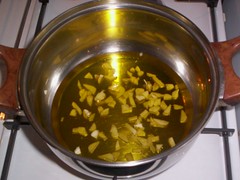
100_6878

Olive oil ready to sizzle the garlic
(That's a lot of oil, but Nina is not scared.
It is locally pressed oil from locally grown olives.
It can do no harm, she believes.)

9. In the meanwhile, heat the water in which the veggies were cooked. Once it starts boiling, add the spaghettini and some salt. Cook it uncovered until al dente. Once cooked, drain much of the water from it, reserving some in the pan.
10. The tomato sauce must be ready now with a smooth, homogenous consistency. Add it to the pan with the Spaghettini. Add the cooked veggies too. The dish should be rather soupy. Give it a stir and check the taste for salt.
11. Ladle it into deep dishes/bowls. Sprinkle crushed pepper and grated Pecorino or Parmesan cheese over it.

Serve hot with some olives and warm Ciabatta bread on the side. Mmmmmmm....... Buono.... :)

I think, this makes a fitting entry for Meeta's Monthly Mingle with 'Holiday Cuisine' as the theme this time. Here I come, Meeta.....

Tags: , , ,

Wednesday, September 06, 2006

Pista Choco Squares

100_6845

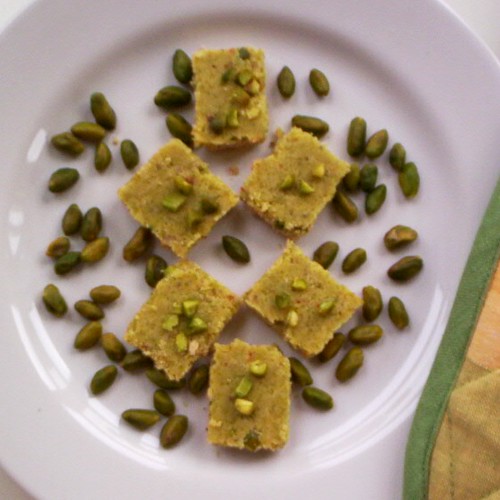
Pista Choco Squares
I am back from my holiday. Relaxed and charged up. Contradictory? Maybe...but that is how I feel right now. :) Because I had a great holiday. Short, yet very very sweet. Will write more about it in the next post.
In this post, I must write about the sweet that I made using the low-fat, quick-to-make Khoya. I have promised it to Vineela, and she must be waiting for me to send this post to her, so that she can finish doing the round-up for JFI. Sweet of her.

Now about the dish. I made it using a recipe for Pista Choco Roll by Tarla Dalal. The recipe looked rather uncomplicated to me, when I began. I was looking forward to shaping the sweet in rolls. However, when I actually started making them, I observed a few things. Like
a) it was very difficult to shape the dough, let alone making dainty rolls out of it. Perhaps it was because of the homemade Mawa that I used. Or perhaps the recipe lacks something. As a result, I had to make squares out of it.
b) Also, I am quite sure, that food colour has been used in it to make it look as attractive as it does in the picture on Dalal's website. I have seen this sweet in Mithai shops in India, and there too it looks much darker in colour. Since I am not really in favour of using food colour, I did not use any. So, my preparation looks somewhat paler.
However, it has all the taste that can make your tastebuds rock. ;-) More while explaining the recipe.

Recipe for Pista Choco Squares

Ingredients:

1 cup grated Khoya (Mawa)
¼ cup powdered sugar
1 tsp cocoa powder (I used grated chocolate instead, but I would recommend cocoa powder.)
2 tbsp chopped pistachios (I powdered them.)
+ a couple more pistachios, chopped, for garnishing
2 drops rose essence (I used a few drops of pure rose water.)

Method:

1. Combine the Khoya and powdered sugar in a heavy bottomed pan and cook on a slow flame, while stirring continuously till the sugar has dissolved and the moisture has evaporated. However, please make sure, that it does not become too dry and crumbly to handle.

100_6839

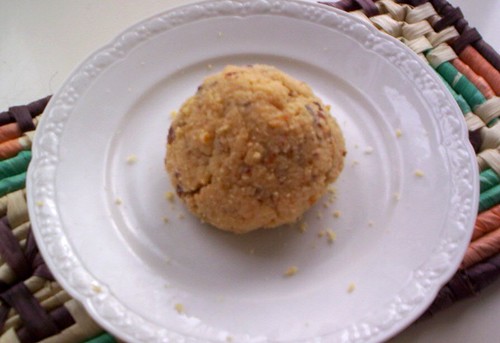
Khoya, after roasting with powdered sugar
(I think, 'real' Khoya will look much smoother and more shiny once roasted.)

2. Cool it completely. Then add the rose essence/water, and divide the mixture in two portions.
3. Add the cocoa powder to one portion and mix well. Add the chopped/powdered pistachios to the other portion and mix well. In case the mixture has become too loose, add a few drops of ghee or milk to tighten it.
4. In a shallow dish/Thali, press the portion with cocoa powder and even out the surface. Then press the pistachio portion on it, and even out the surface again. Press the chopped pistachios set aside for garnishing on it.
5. Let the dish/Thali rest for 15-20 minutes. Then cut the sweet into squares.

Serve as dessert. I think, it will be appreciated most, if offered to children as a surprise treat. Maybe when they come to your place to scare you for Halloween? :)